Posted on

Portland Hoosier Super Tour Recap: Setup Windows, Mental Unlocks, and a T3 Weekend Sweep

Racer on Rails Nissan 370Z leading a mixed Touring 3 race group through Portland International Raceway during the Oregon SCCA Hoosier Super Tour.
Gama Aguilar-Gamez leads the Touring 3 field in the Racer on Rails Nissan 370Z during the Oregon SCCA Hoosier Super Tour at Portland International Raceway.

The SCCA Hoosier Super Tour is one of the biggest stages in amateur road racing. It is where regional racers, national contenders, Runoffs hopefuls, longtime club racers, and professionally prepared teams all end up in the same paddock, chasing the same thing: speed that holds up when the stopwatch and the field both get serious.

For Racer on Rails, weekends like this matter because they are more than another race on the calendar. They are measuring sticks. They show where the cars are, where the drivers are, where the team is operating well, and where the next layer of performance is hiding.

This round brought us back to Portland International Raceway for the Oregon SCCA Hoosier Super Tour. PIR is a uniquely Northwest kind of racetrack. It sits inside a major city, close to the Columbia River, built on land with real history, surrounded by trees, planes, cyclists, and the strange calm of a public park that also happens to host serious race cars. It is one of those places that feels easy until you try to be fast there.

On paper, Portland looks simple. It is flat, relatively short, and does not have the obvious “monster corner” personality of a place like Road America, Thunderhill, or Sonoma. But that is exactly the trap. PIR asks for precision everywhere. The lap is full of medium-speed commitment, heavy braking moments, curb usage, track-out discipline, and small setup decisions that either build confidence or quietly steal time every lap. If the car is not underneath you, the track exposes it. If the driver is not fully committed, the stopwatch tattles immediately.

Racer on Rails Nissan 370Z Touring 3 race car driving over the curbing at Portland International Raceway with race traffic behind.  | (C) 2025 Doug Berger | DBPics
The Portland chicane rewards commitment, curb confidence, and a car that stays predictable under braking and turn-in. (C) 2025 Doug Berger | DBPics

Our weekend lineup had a little bit of everything.

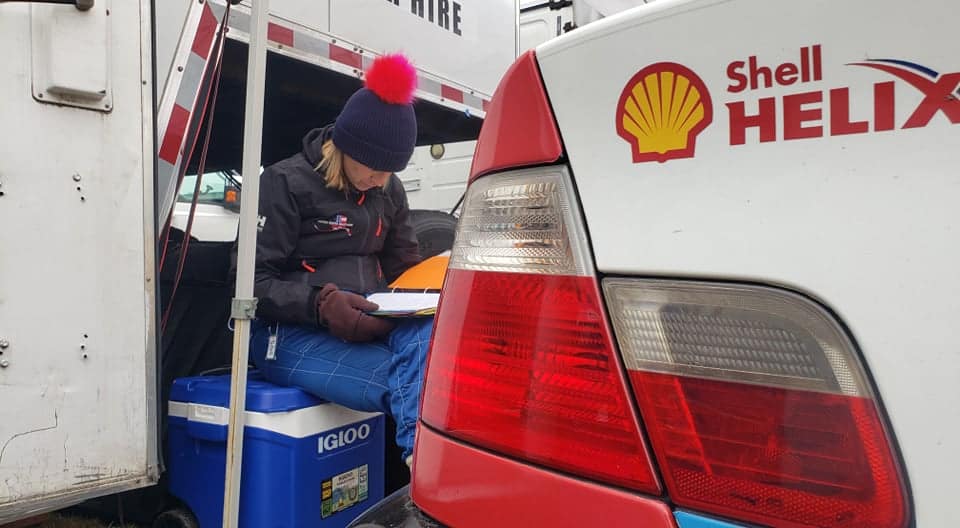
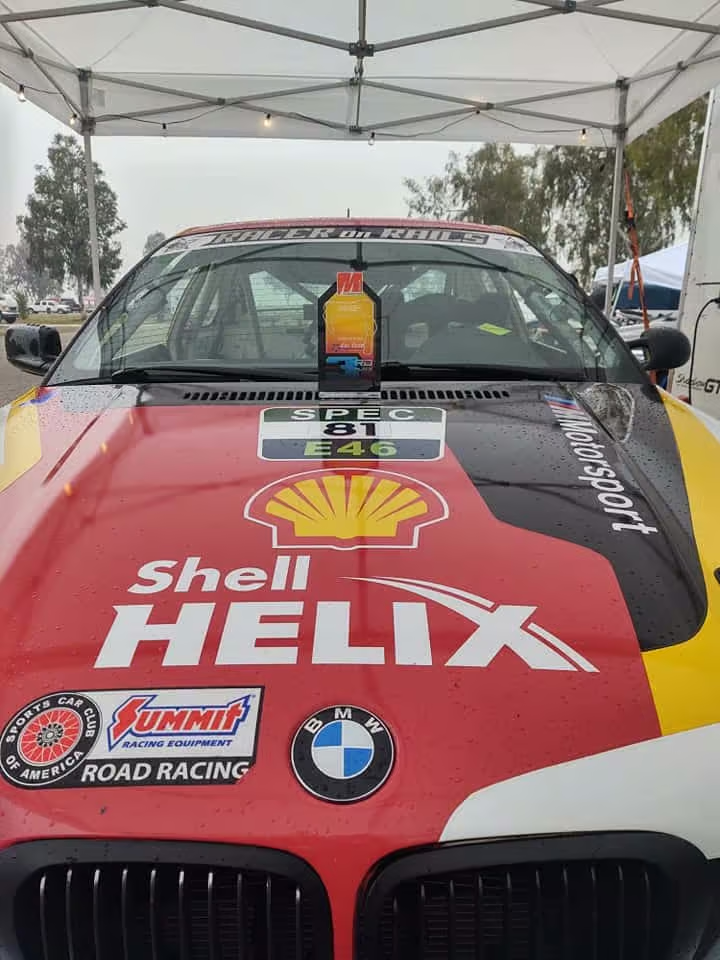
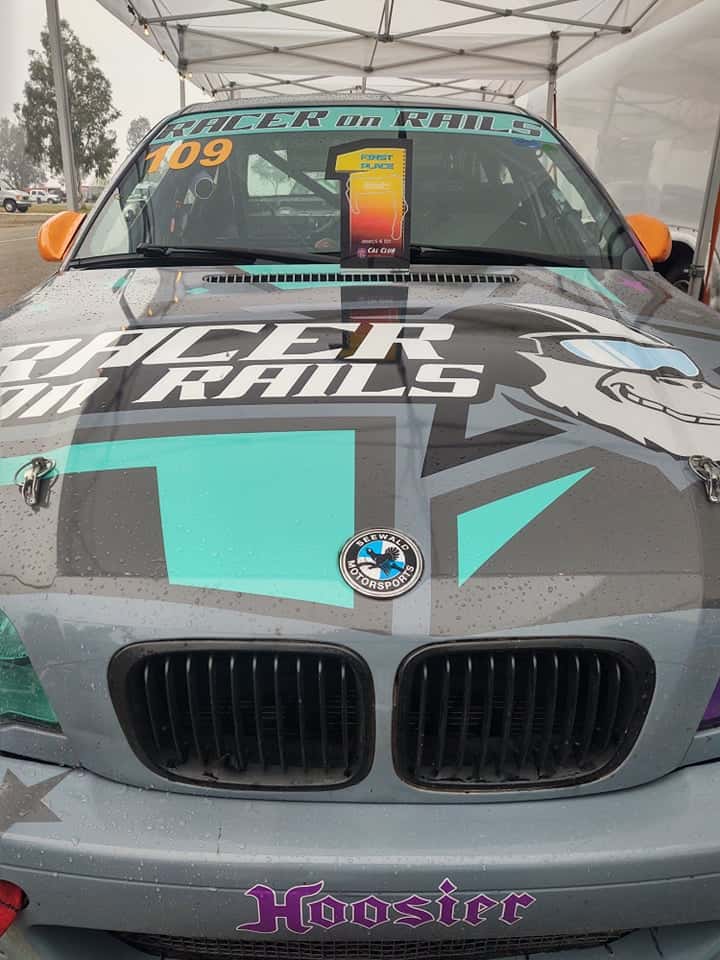
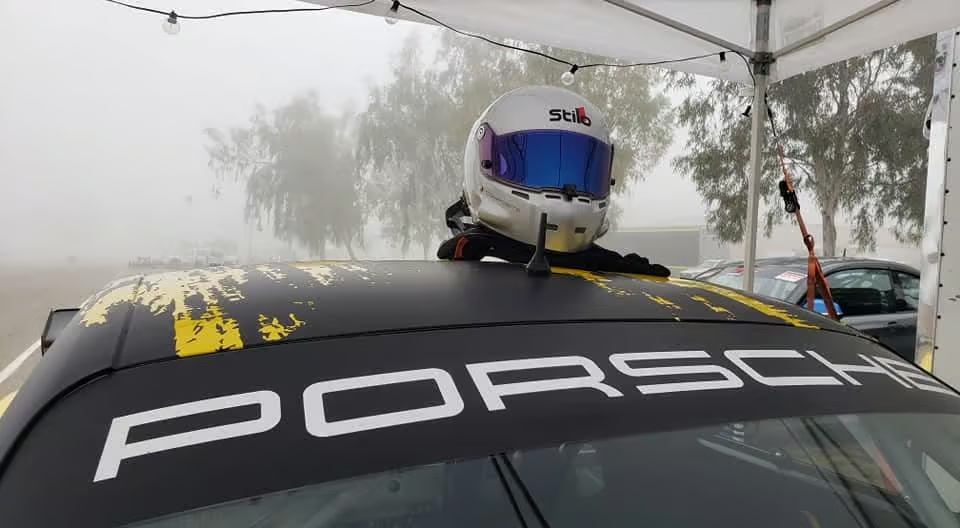
Chris Johnson was back in his Spec E46 in Touring 3 for the first time since last July. Gama Aguilar was in the Nissan 370Z, also in Touring 3, continuing the development push from Thunderhill. Beef Wellington brought out his Touring 2 BMW M240iR. And while Ron Tanemura was not technically in one of our cars, he was still part of the broader Racer on Rails driver development program, racing a Spec Racer Ford Gen3 with Flat Out Racing and continuing to work with Tyler through our coaching services.

Different cars. Different goals. Same weekend. Same stopwatch.

Chris Johnson: Back in the Saddle, Then Fully Lit

Chris started the weekend exactly where you might expect after nearly a year away from the car: knocking the dust off.

The Spec E46 was on older tires, Chris was rebuilding rhythm, and the first part of the test day was about getting reconnected with the car. Braking points. Corner entries. Trust. References. The little internal checklist every driver has to rebuild after time away.

Chris Johnson driving the blue Racer on Rails BMW Spec E46 Touring 3 race car through Portland International Raceway with race traffic close behind.
Chris Johnson returned to the seat of his Spec E46 in Touring 3 and spent the weekend rebuilding rhythm, confidence, and pace. (C) 2025 Doug Berger | DBPics

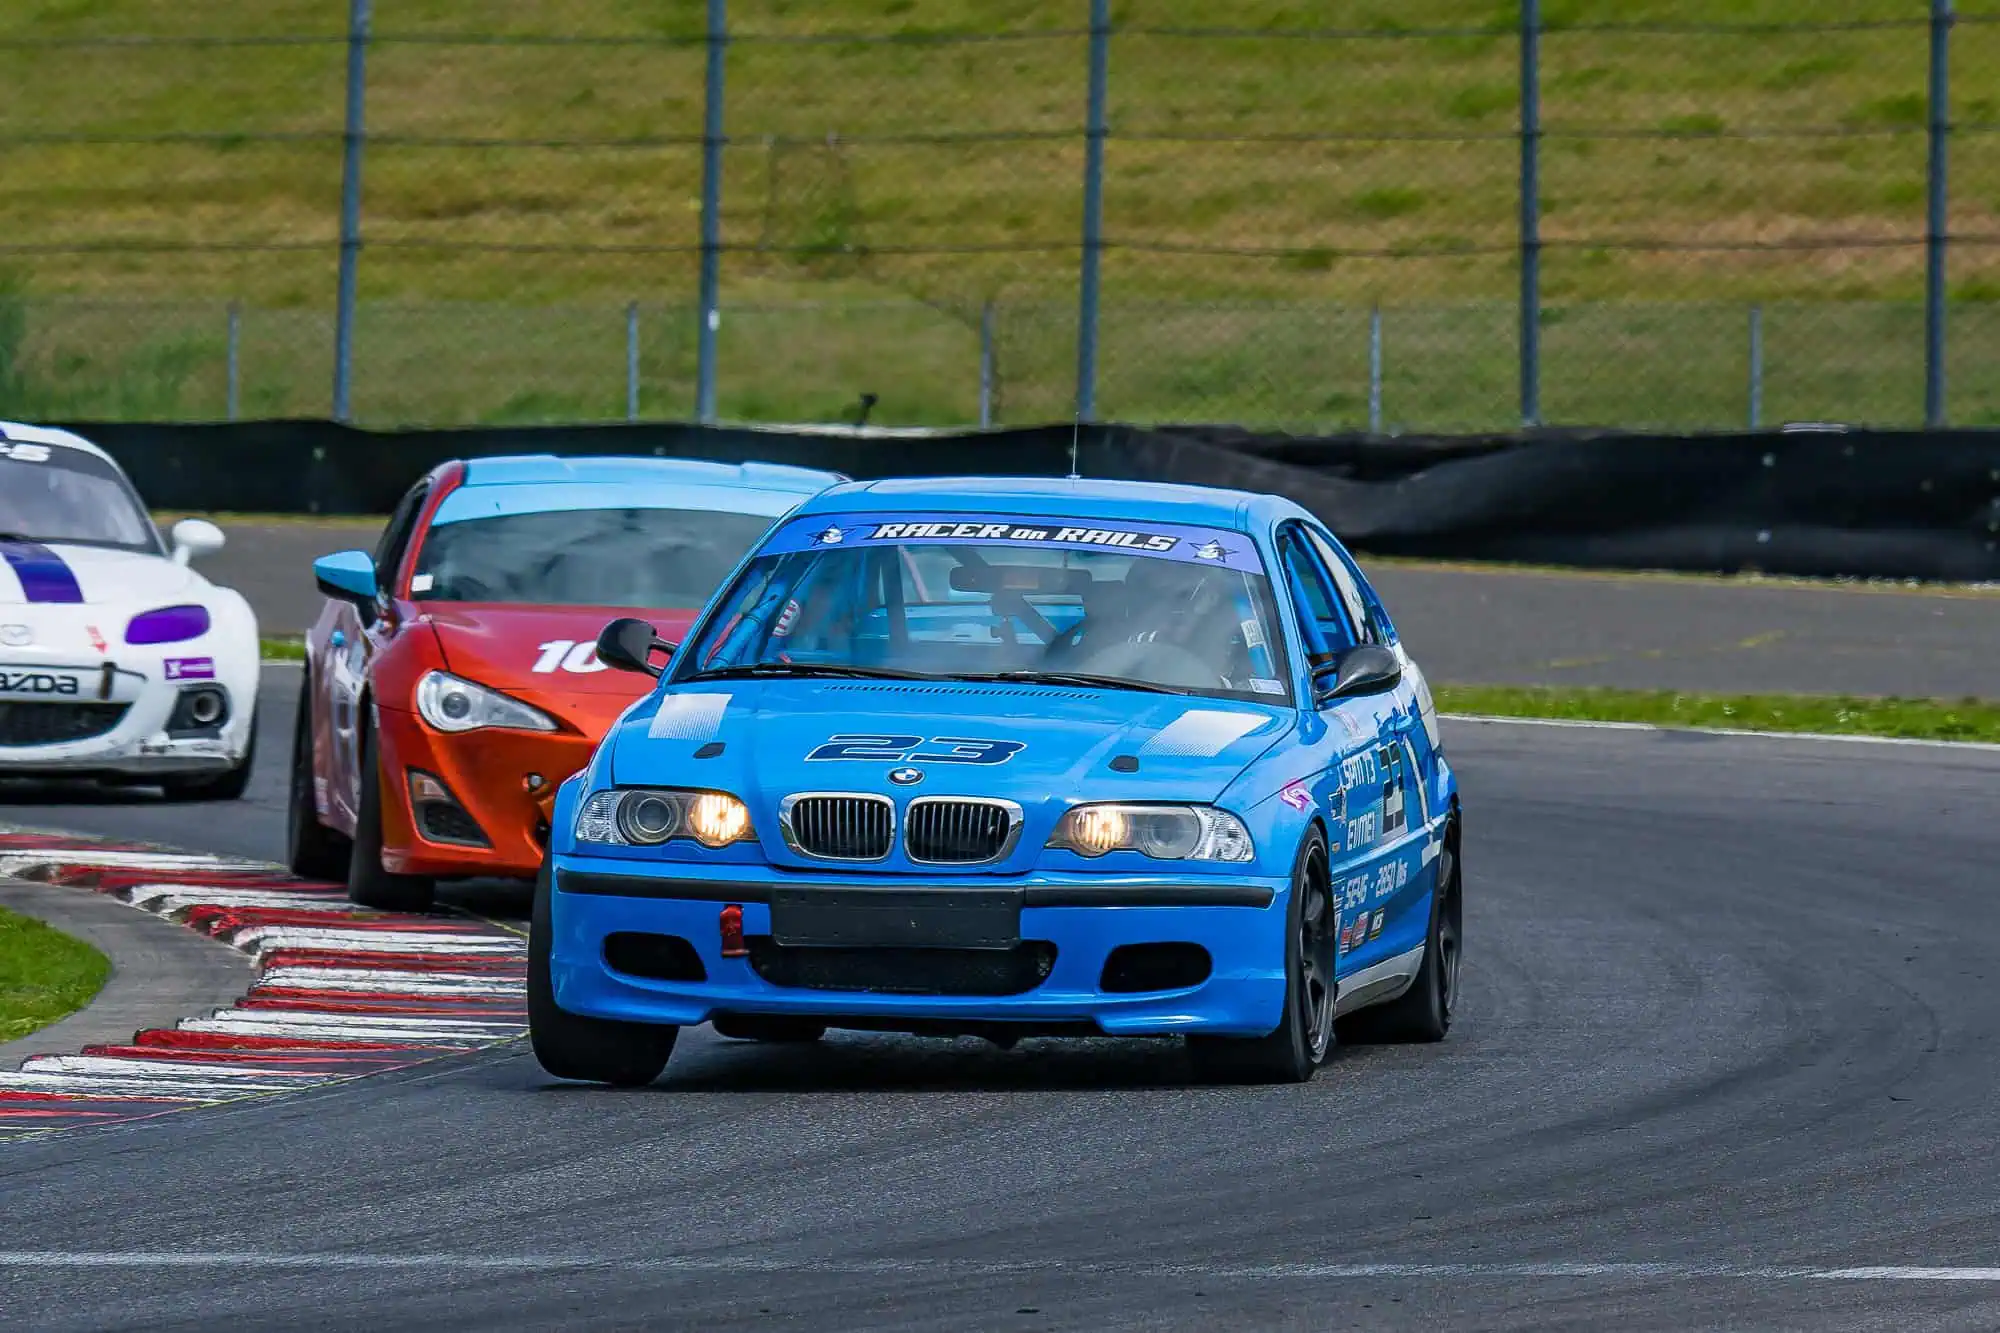
By the end of the first test day, though, the fog was clearing. Even as the track got hotter and conditions worsened, Chris started closing back in on his personal best lap times. That was the first sign that the speed had not gone anywhere. It was still there, sitting under the surface, waiting for him to believe it was available again.

The next day, we had one of those conversations that matters more than a shock adjustment or tire pressure change.

Chris was talking through what he was feeling in the car, but underneath the words were a few limiting thoughts. Not excuses. Not weakness. Just the normal stuff drivers tell themselves when confidence is still a lap or two behind capability.

The conversation was about the things we tell ourselves. What we accept as true. What we assume is possible. What we decide is “about where we are” before the car and the data have actually said that.

Something clicked.

In Saturday’s race, Chris came alive. He got pulled into a tight battle with a few out-of-class cars that were absolutely flying, and that extra competitive energy did exactly what a good race battle should do. It sharpened him. It pulled his eyes forward. It made him stop driving the idea of the lap and start racing the car in front of him.

The result was a major unlock. Chris knocked roughly a second from his previous bests and started driving with the kind of intent we knew was still there.

Sunday morning, he was determined to prove Saturday was not a one-off. He wanted to build on the confidence instead of simply enjoy the memory of it.

He did.

Blue Racer on Rails BMW Spec E46 Touring 3 race car using the curbing at Portland International Raceway during the Oregon SCCA Hoosier Super Tour.
By Sunday, Chris was driving with more commitment and using the confidence from Saturday’s race to unlock another step forward. (C) 2025 Doug Berger | DBPics

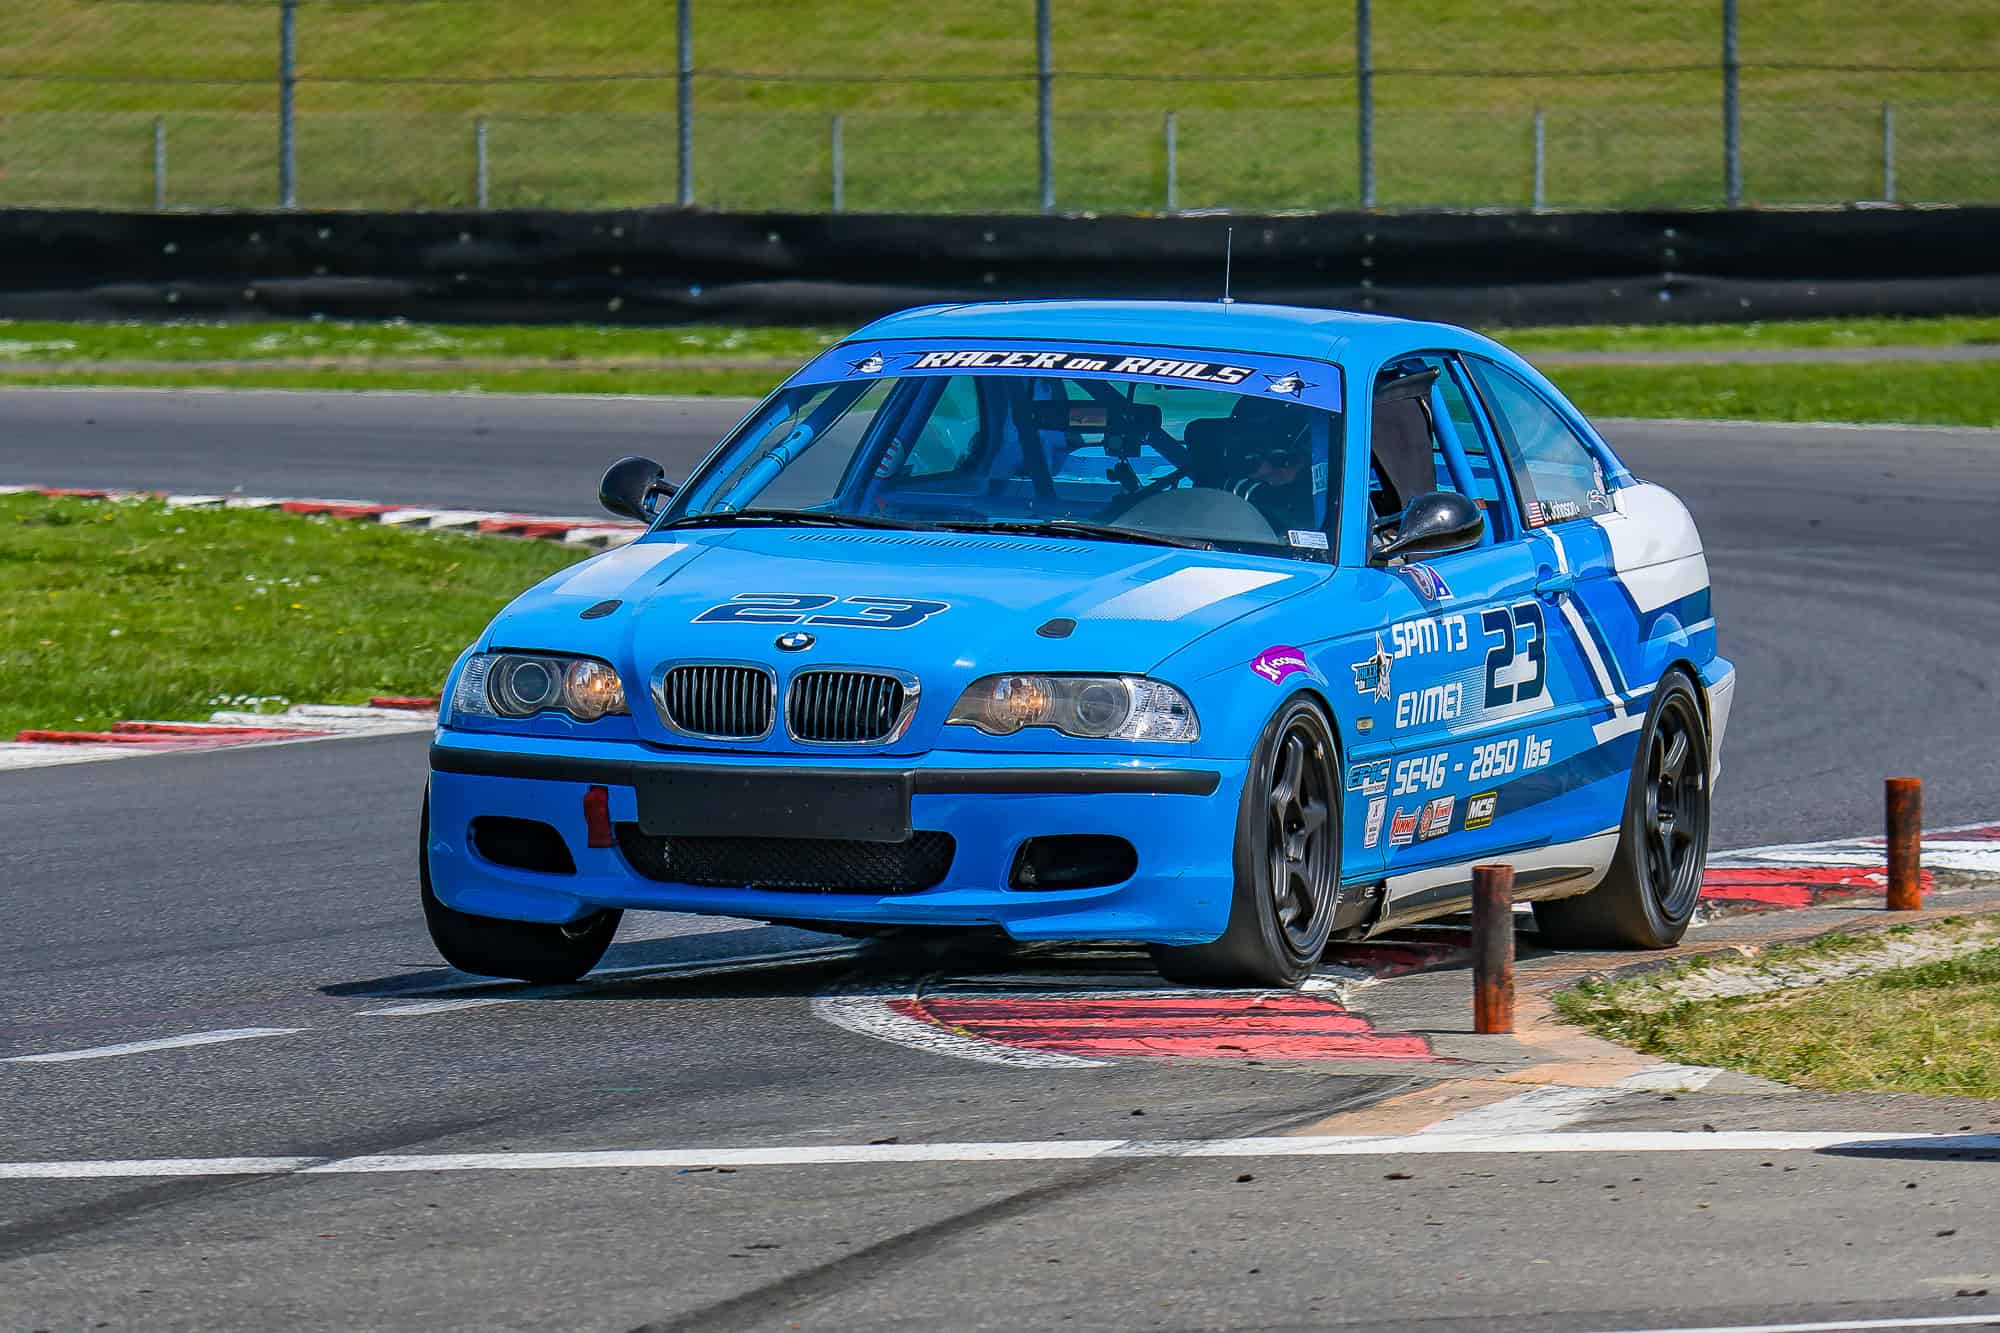
In Race 2, Chris carried the lessons forward. He cleared the cars he had been battling with on Saturday and found himself racing farther up the field, with new competition and a new target. That is always one of the best signs in driver development: yesterday’s mountain becomes today’s baseline.

The wild part? He did all of this while nursing an engine that had given us a scare on Friday. Chris had an over-rev, followed by white smoke out the tailpipe. Jordan kept a close eye on the car for the rest of the weekend, and thankfully it made it through without getting worse.

So yes, Chris had a big weekend on the stopwatch. But the bigger unlock was mental. This was a driver remembering that confidence is not something you wait around to receive. Sometimes you have to go take a bite out of the lap and let the confidence catch up.

Chris Johnson driving the blue Racer on Rails BMW Spec E46 Touring 3 race car ahead of race traffic at Portland International Raceway.
Chris found himself racing harder, cleaner, and farther up the field as the weekend progressed. (C) 2025 Doug Berger | DBPics

Beef Wellington: A Short Weekend, But the Right Call

Beef’s weekend ended earlier than anyone wanted.

The BMW M240iR had a solid shakedown at Pacific Raceways the week before, so we came into Portland expecting to continue learning the car and building momentum. Instead, the car started overheating after only four or five flying laps.

At first, it looked like the usual race-car mystery novel: temperatures okay, then suddenly not okay. The car would run fine, then start building too much coolant pressure and blow through the expansion tank valve.

The team worked through the problem methodically. Cooling system. Pressure behavior. Failure pattern. Repeatability. The ugly little clues all started pointing in the same direction.

Head gasket.

Mega bummer.

That is never the way we want a weekend to end, especially with a new-to-him but still used/junkyard engine. But there is a version of this story that is much worse. We caught it before destroying the whole engine, avoided turning a repair into a full-scale catastrophe, and got the car pointed toward the work needed before June Sprints at Road America later in the month.

Sometimes race weekends are about trophies. Sometimes they are about knowing when to stop digging.

This was the right call. Not fun. Not glamorous. But right.

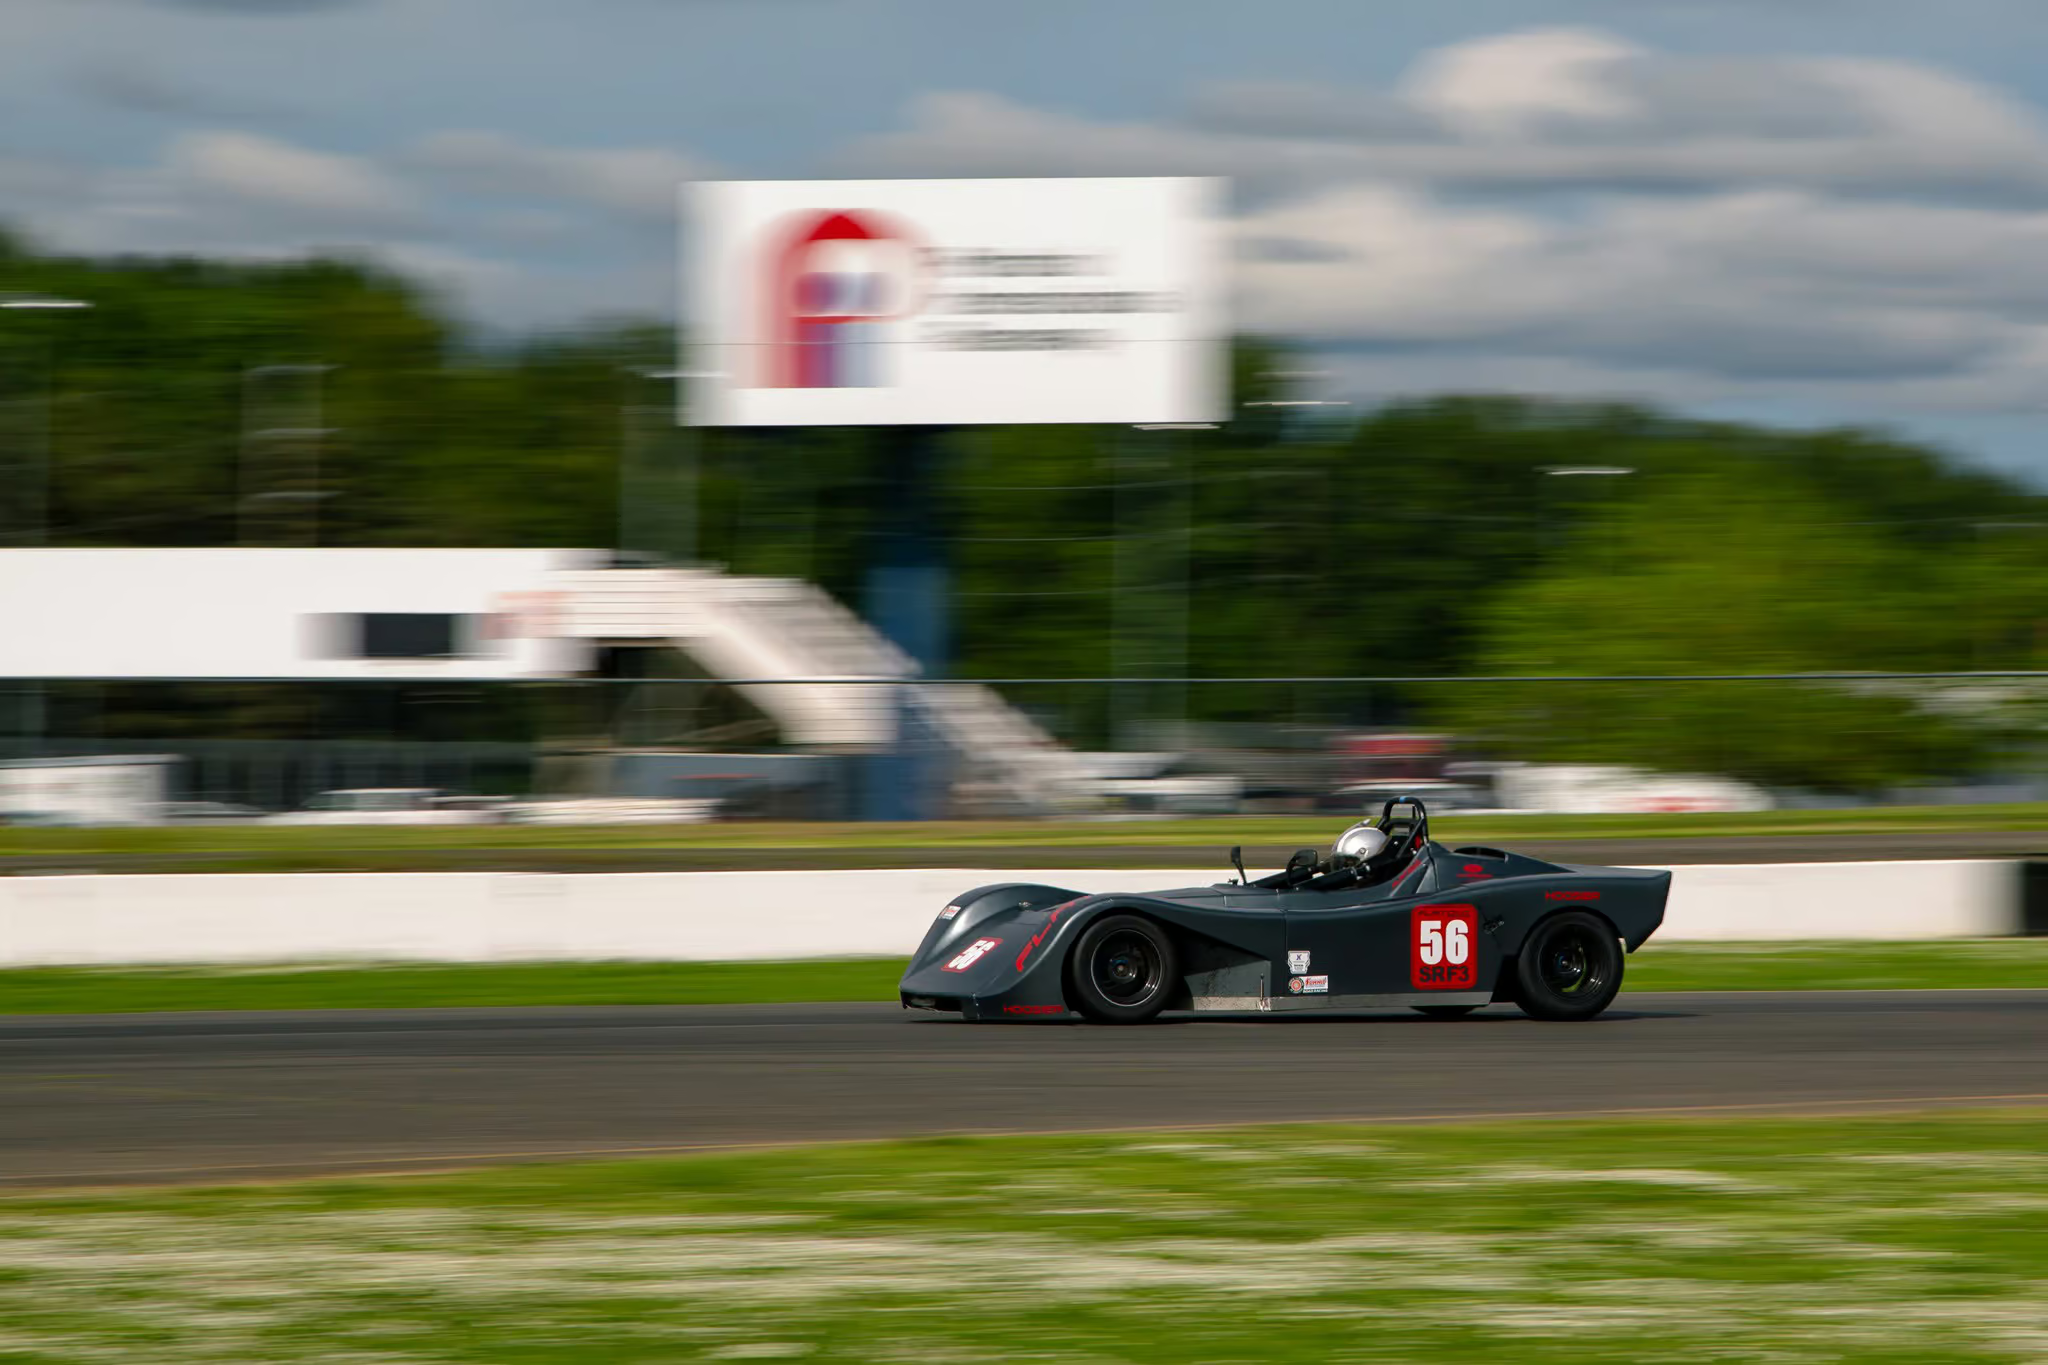
Ron Tanemura: Expanding the Driving Toolbox

Ron’s Portland weekend had a different purpose.

He was in a Spec Racer Ford Gen3 rental with Flat Out Racing, while continuing to work with Tyler as part of the Racer on Rails coaching program. The goal was not simply to jump in a new car and chase a number. The goal was to expand his driving range.

That matters.

Ron has been intentionally building a broader driving education. Different platforms. Different sensations. Different demands. The SRF3 is a very different animal from a BMW sedan. It is lighter, more direct, more exposed, and less forgiving of half-commitment. It wants clearer inputs. It rewards decisiveness. It asks the driver to be comfortable with the car moving underneath them.

Ron Tanemura driving a black Spec Racer Ford Gen3 through Portland International Raceway during an SCCA race weekend.
Ron Tanemura used the Spec Racer Ford Gen3 weekend to expand his driving range and build a new real-car baseline. (C) 2025 Doug Berger | DBPics

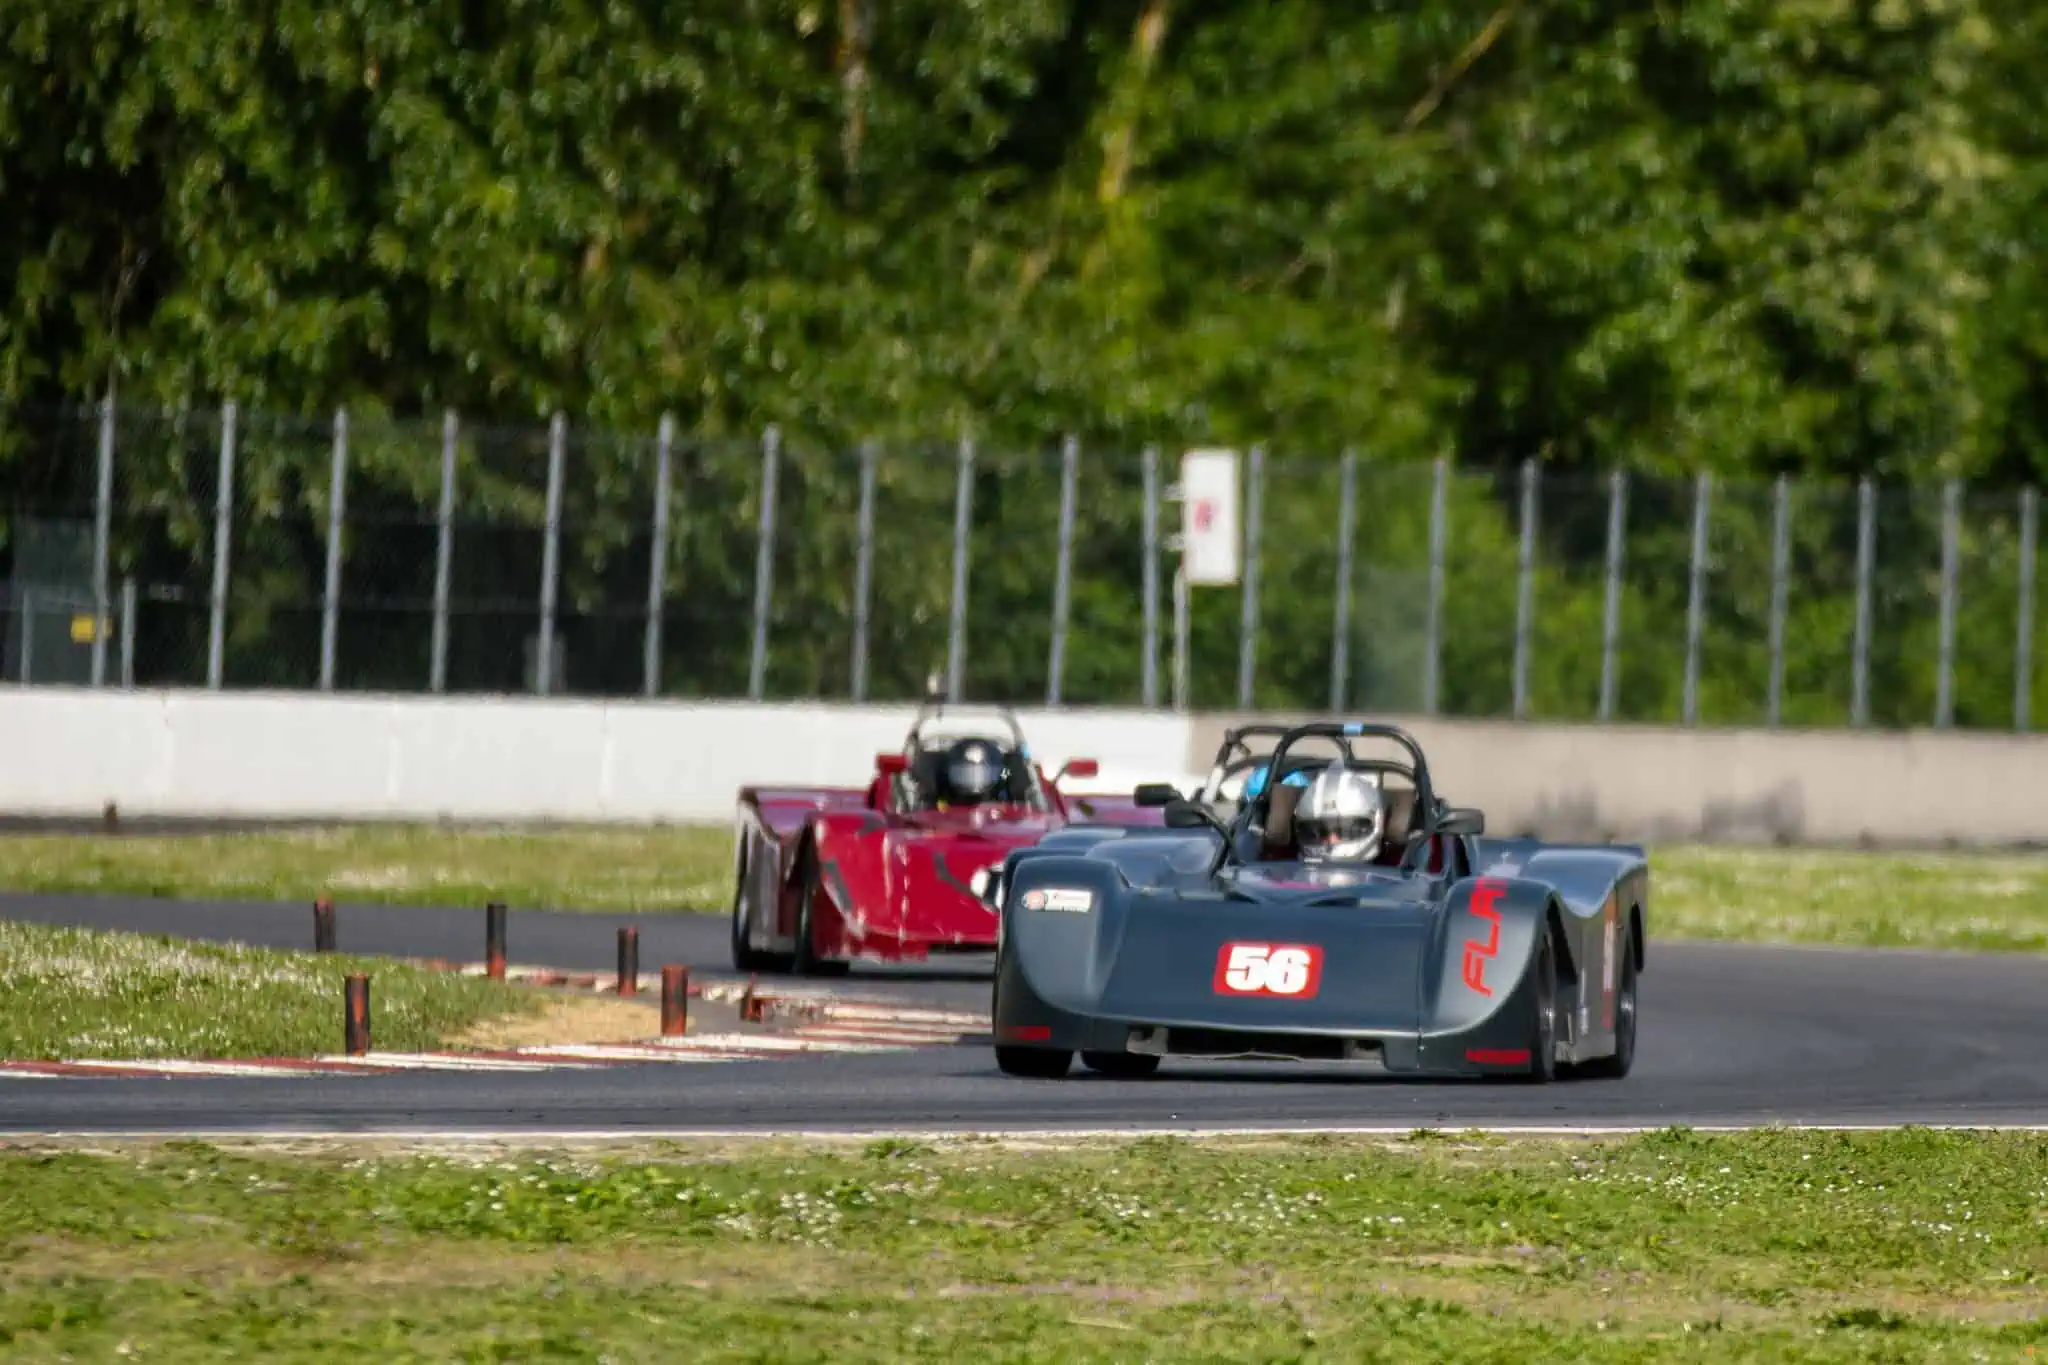
For Ron, the weekend established something important: racing the SRF3 is viable for him. He handled the starts well, showed good awareness, avoided major self-inflicted issues, and built a baseline he can come back to.

The next layer is not secret. It is also not simple.

It is about closing the gap between understanding and execution. Ron has done real work in the sim. He knows a lot of the “recipe” for the car and track. But the real car adds sensation, consequence, tire feel, traffic, imperfect references, and the pressure of being around other drivers. That gap between knowing and doing is where driver development actually lives.

The coaching takeaway was clear: more commitment, more decisive brake release, clearer throttle discipline, more willingness to let the car rotate, and more assertive racecraft once the race settles in.

That is exactly why this was a valuable weekend. Ron did not just collect laps. He collected a sharper understanding of what the next phase of work needs to be.

Black Spec Racer Ford Gen3 race car speeding past the Portland International Raceway front straight during an SCCA race weekend.
A new car, a new rhythm, and another layer in Ron’s broader driver development plan. (C) 2025 Doug Berger | DBPics

And that is the whole point of a driver development plan. Not every weekend is supposed to be a finished product. Some weekends are supposed to reveal the next door.

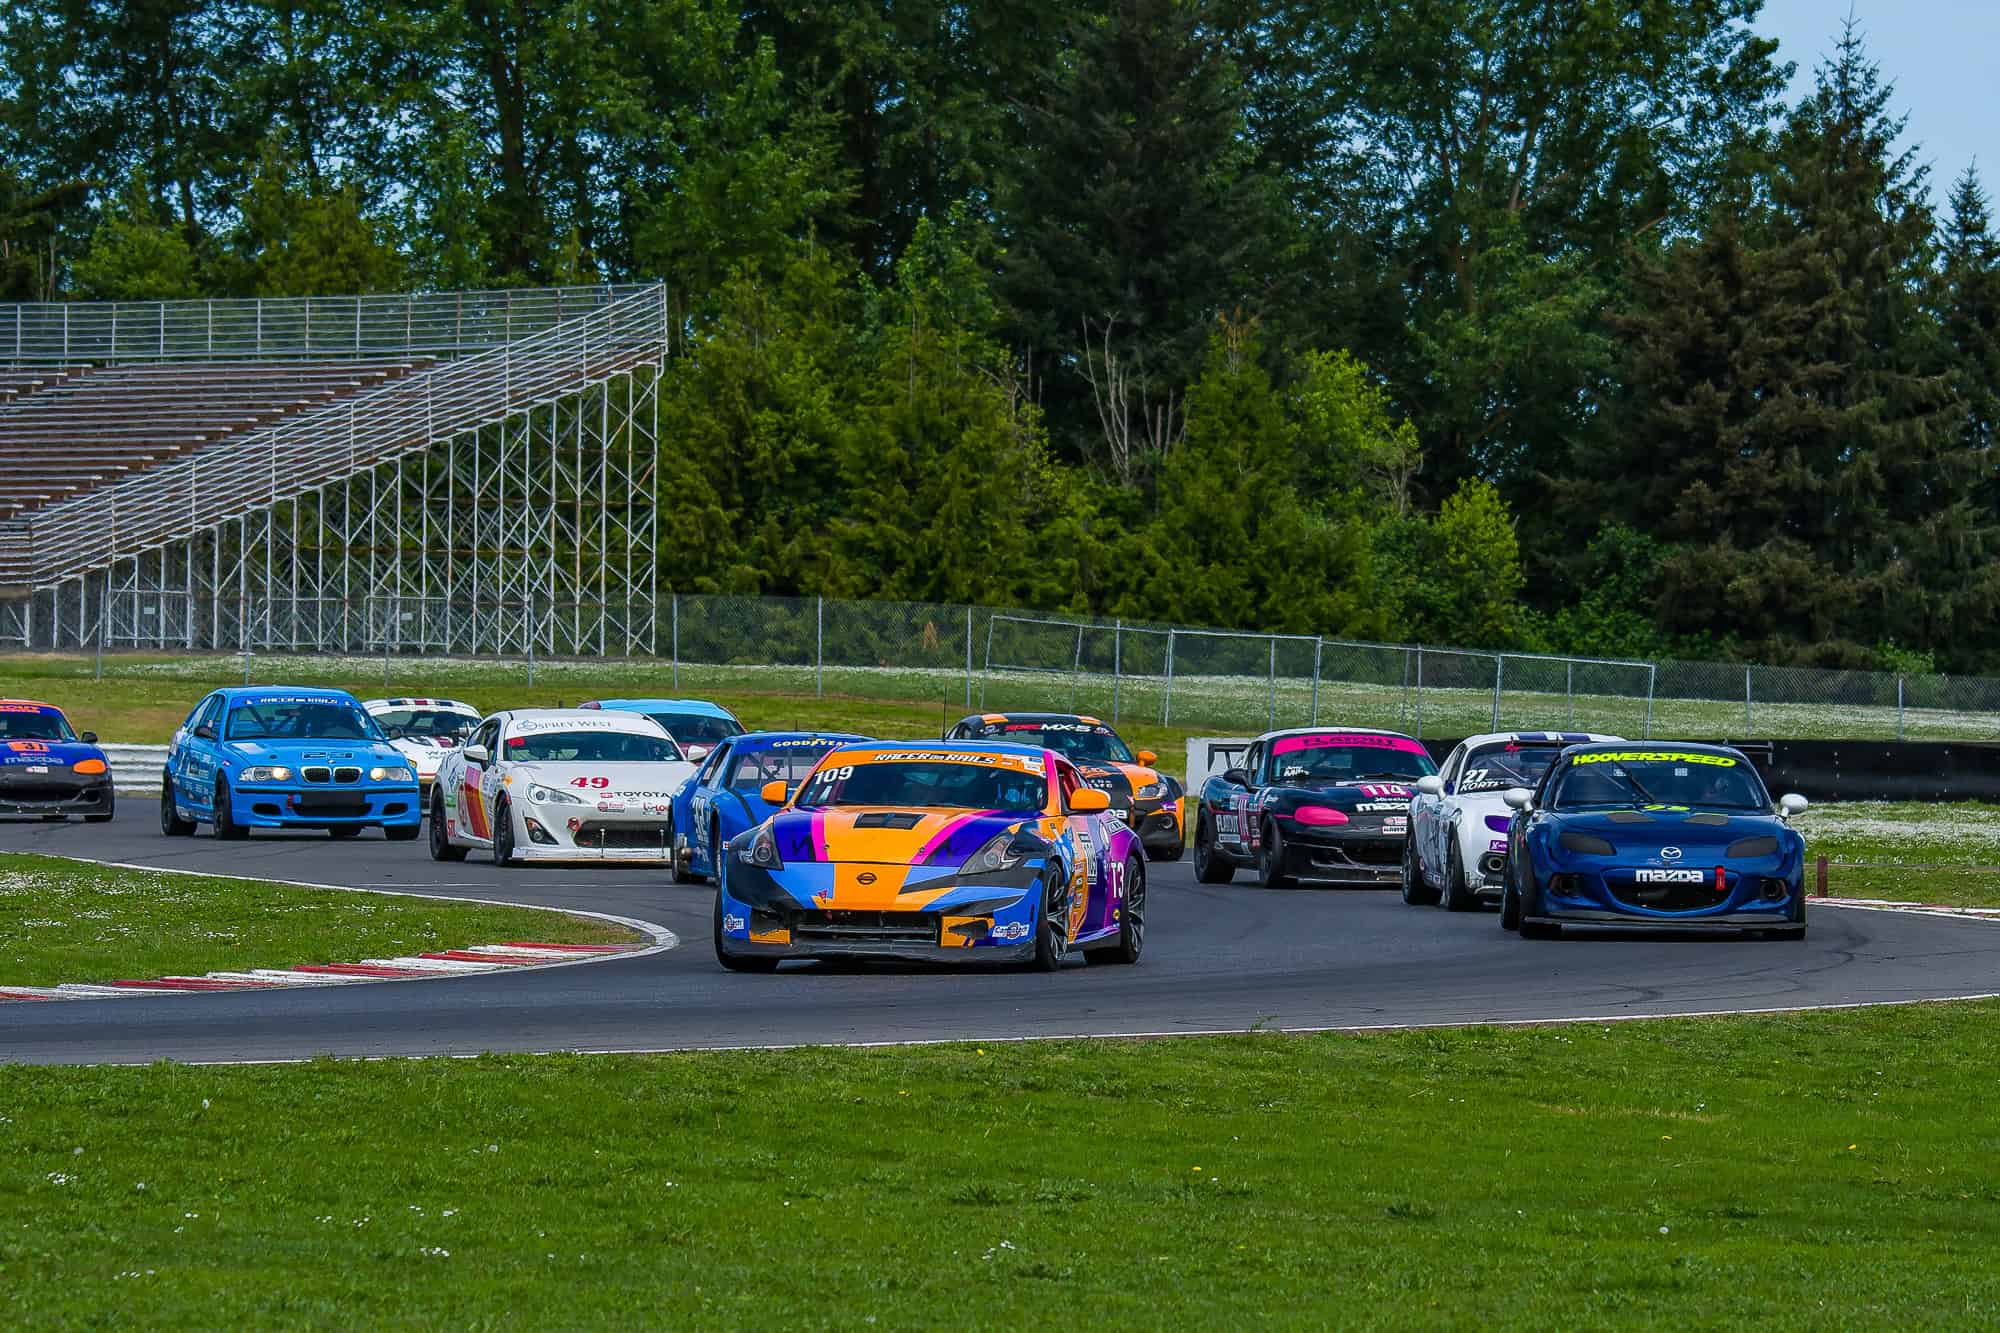
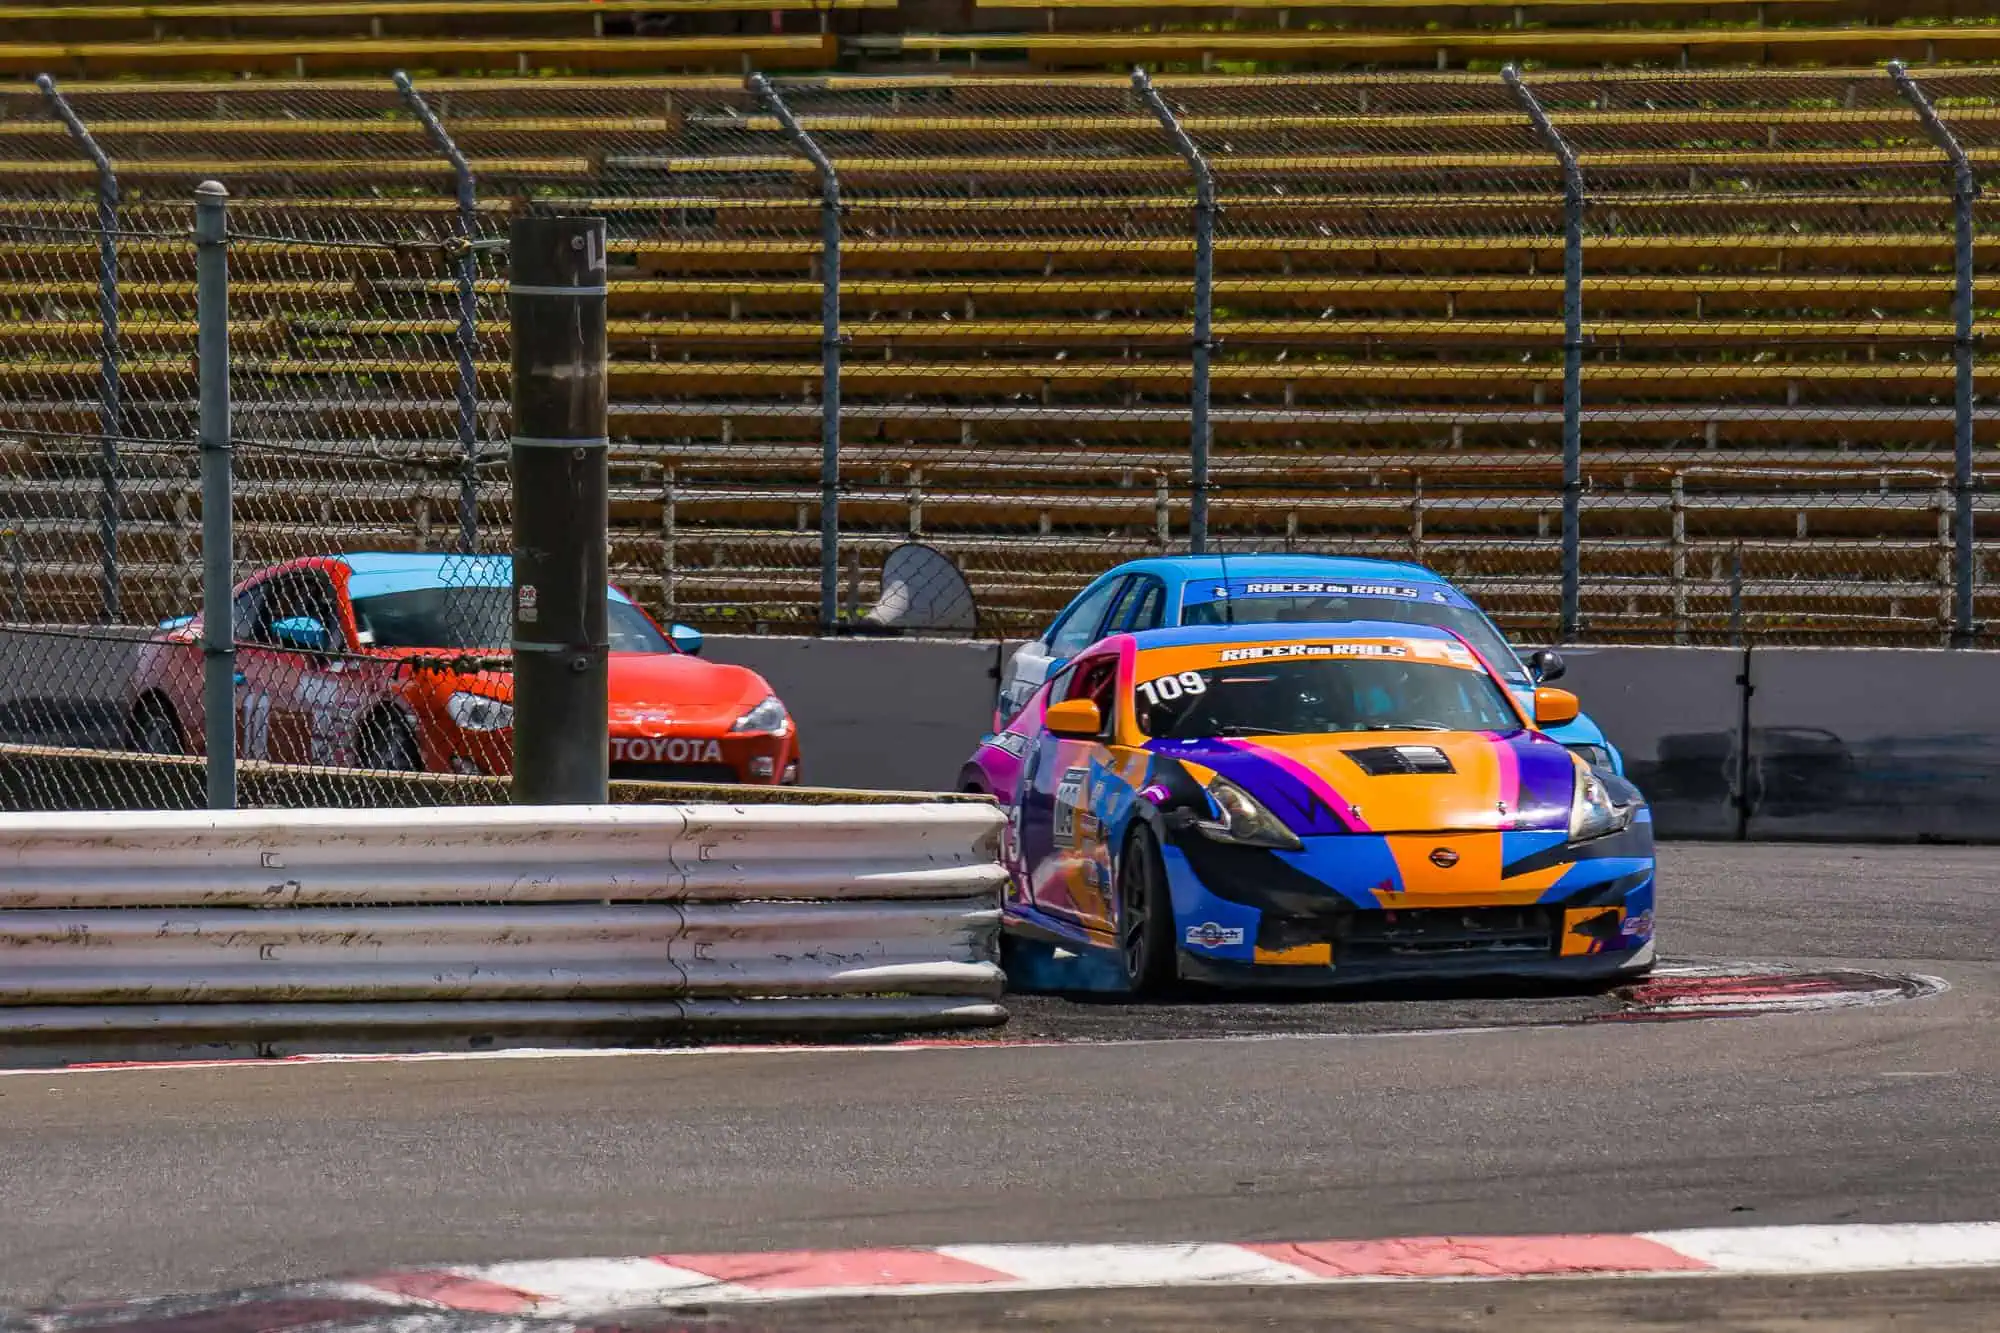
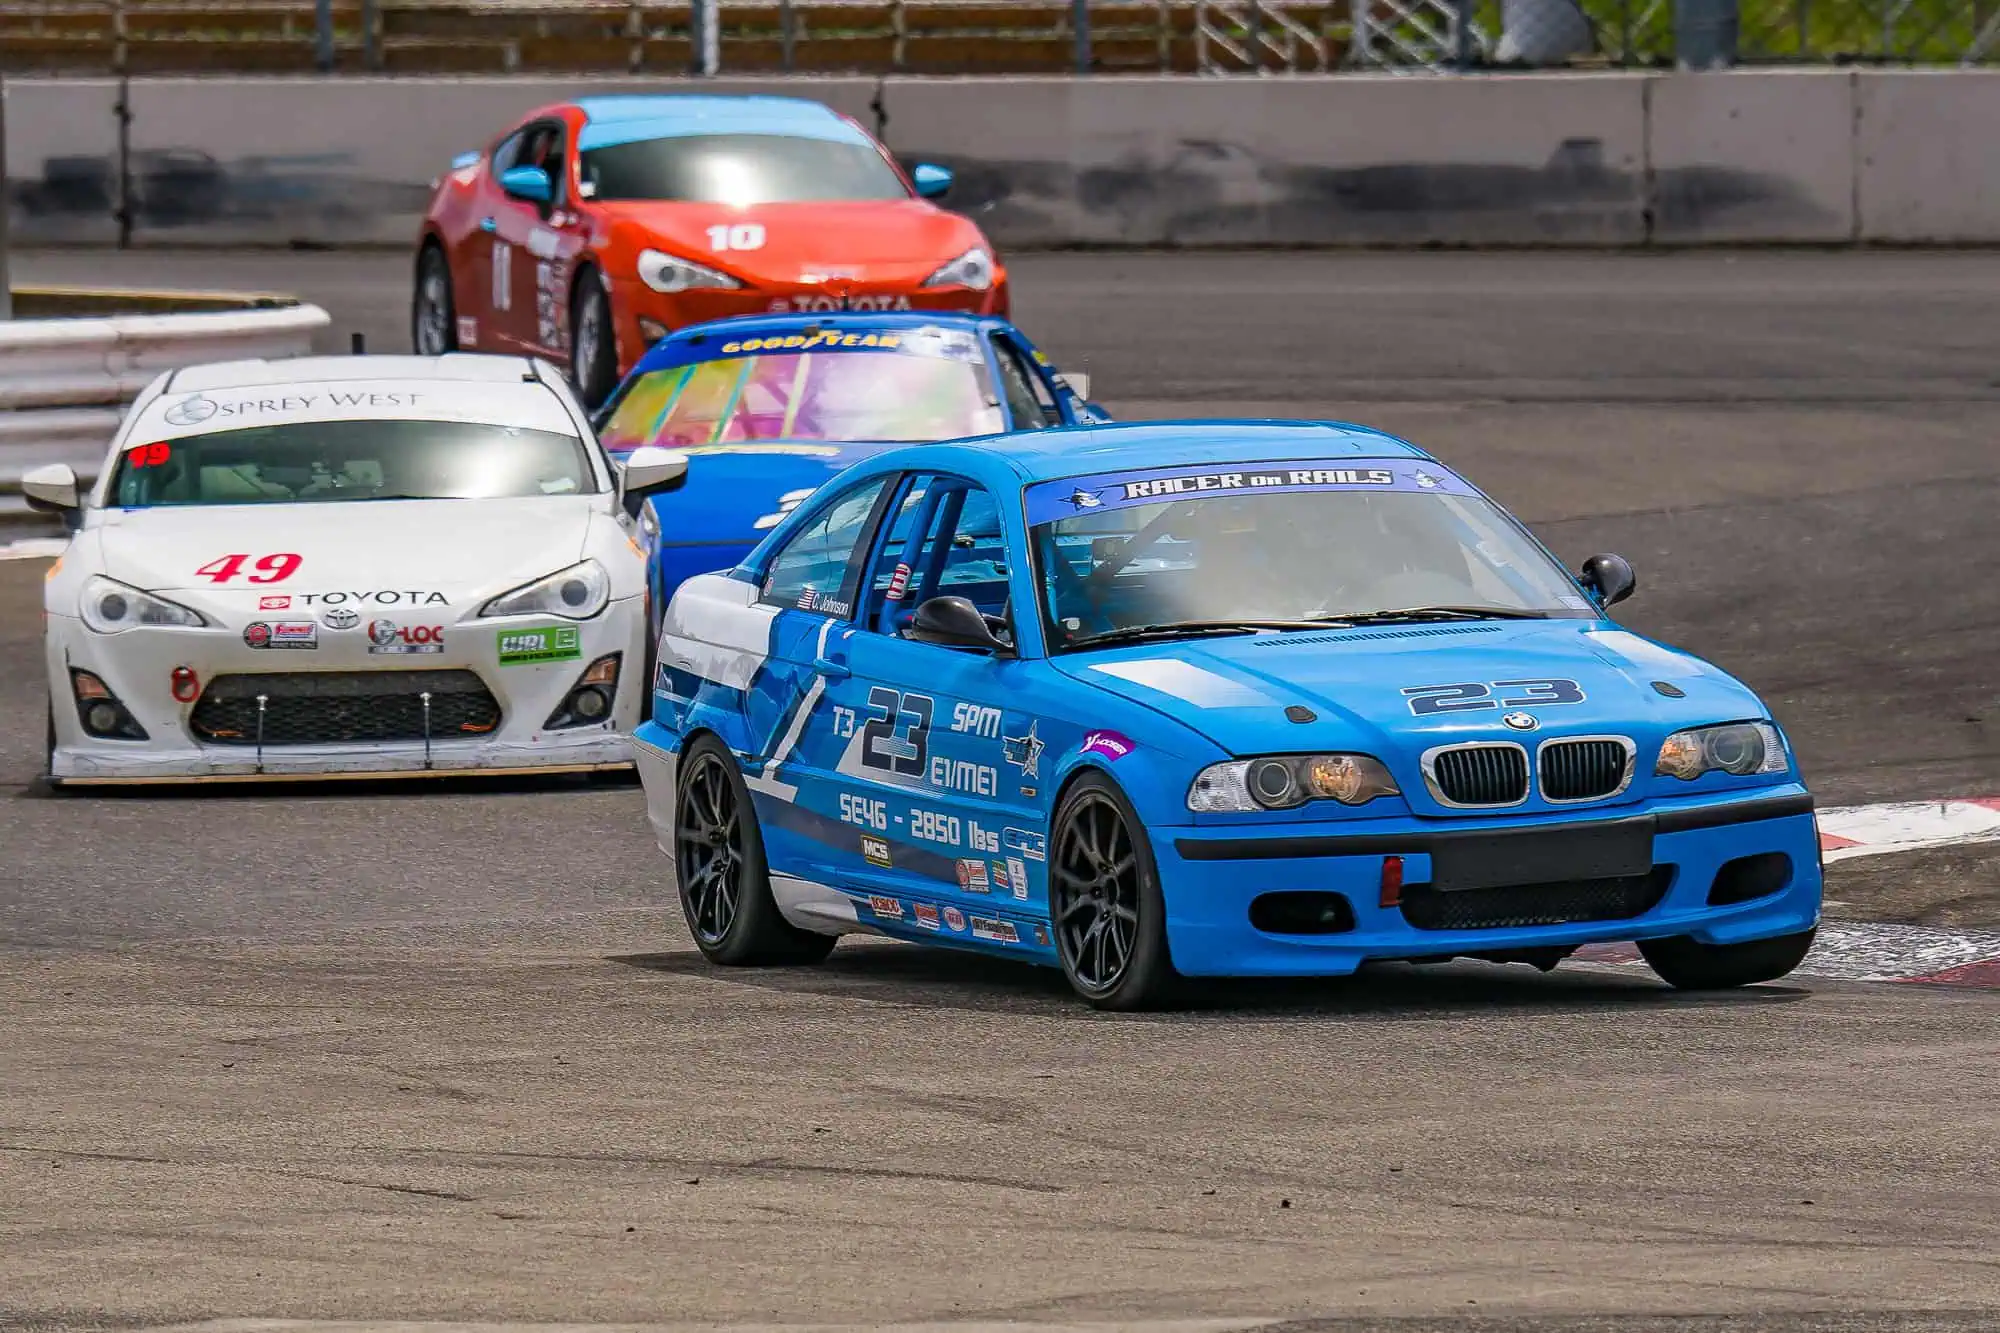
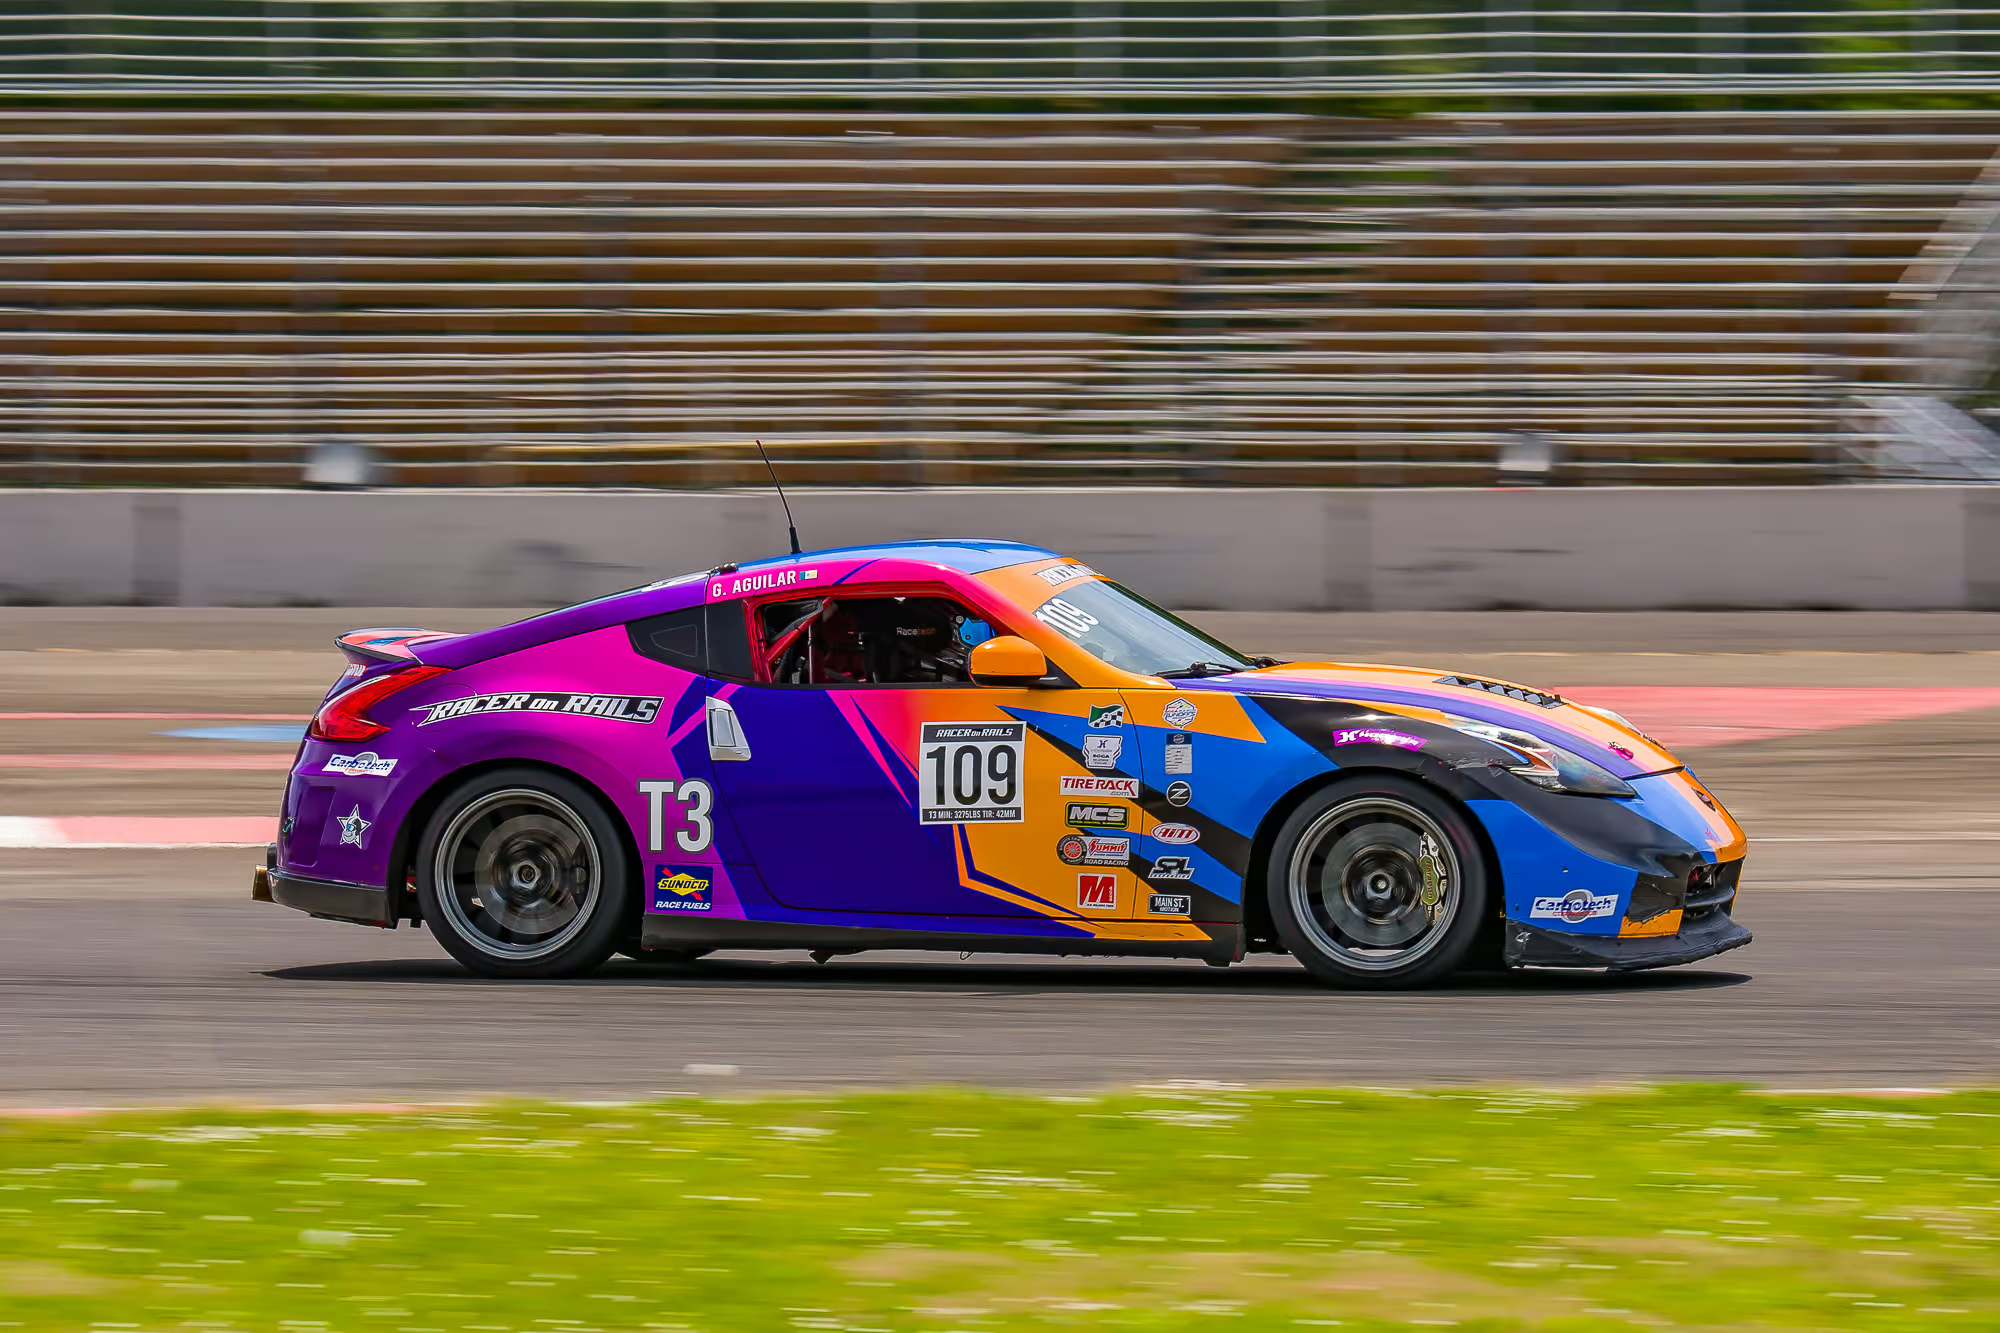
Gama Aguilar: Engineering the Window

For Gama and the Nissan 370Z, Portland was about building on the lessons from Thunderhill.

At Thunderhill, we had speed, but we were still fighting the car. The Z had pace in flashes, but it was not yet living in a consistent, repeatable window. Under braking and turn-in, the car still had moments where it felt like it was asking for trust without giving enough trust back.

Before Portland, Ian spent a full week digging into the chassis, working through an engineering workbook, checking assumptions, and giving the car the kind of measured attention that separates guessing from development. We are not going to give away every detail of what we found, but the big picture was clear: there was systemic pace hiding in the car.

That was the unlock.

This was not about finding one magic adjustment or chasing a one-lap setup. It was about understanding the car at a deeper level, getting it into a healthier operating window, and creating a foundation we could actually build on across a full weekend.

From there, we reset the approach. The chassis setup moved in a better direction. The car became more predictable. We switched to nitrogen in the tires, including multiple purge cycles to reduce the influence of air and moisture. Then we started fresh on understanding pressure build, temperature behavior, and how to keep the tire in a usable window from the first hard lap to the last.

That became the real work of the weekend.

Not “what makes one fast lap?” but “what makes the car fast, repeatable, and trustworthy every time we lean on it?”

By Friday, the difference was obvious. For the first time ever in the 370Z, we could push the car hard every session and have it respond the same way. The car was no longer giving us a narrow little keyhole of performance. It gave us a window. And once we had a window, we could finally start doing real race-car work.

Side profile of the Racer on Rails Nissan 370Z Touring 3 race car at speed on the front straight at Portland International Raceway.
After ride height, suspension geometry, nitrogen, and tire pressure work, the 370Z finally delivered a repeatable setup window. (C) 2025 Doug Berger | DBPics

That is a big deal.

The official Race 1 time cards showed the progress starting to show up on paper, with the #109 370Z quickly moving from a 1:26.946 opening lap into a 1:24.759, then a 1:24.526, then a 1:24.701. More important than the single lap was the shape of the run. The car stayed in the window. The laps stayed usable. The team finally had a platform we could tune instead of survive.

By the race weekend, we were fine-tuning instead of firefighting.

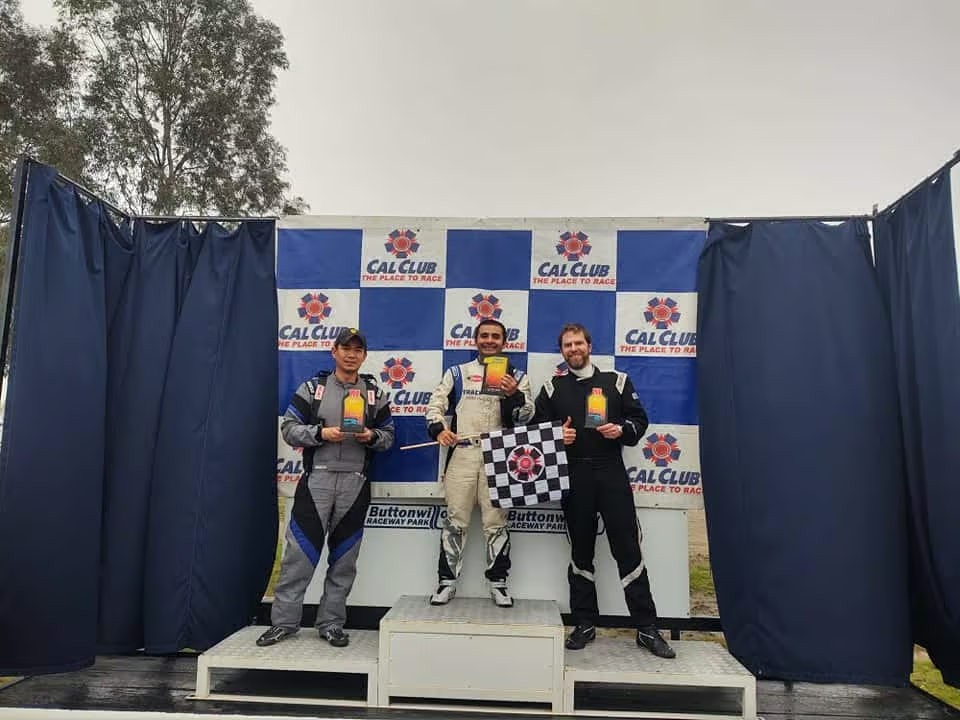
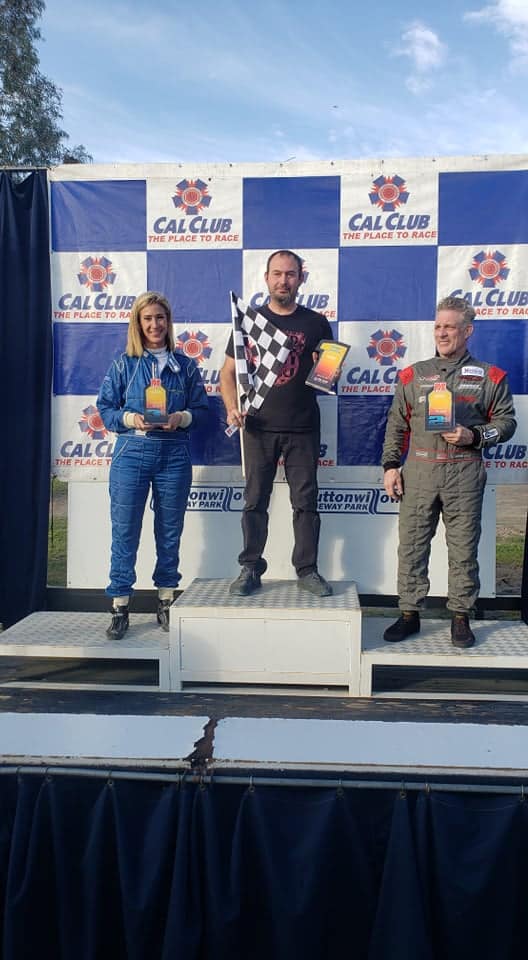
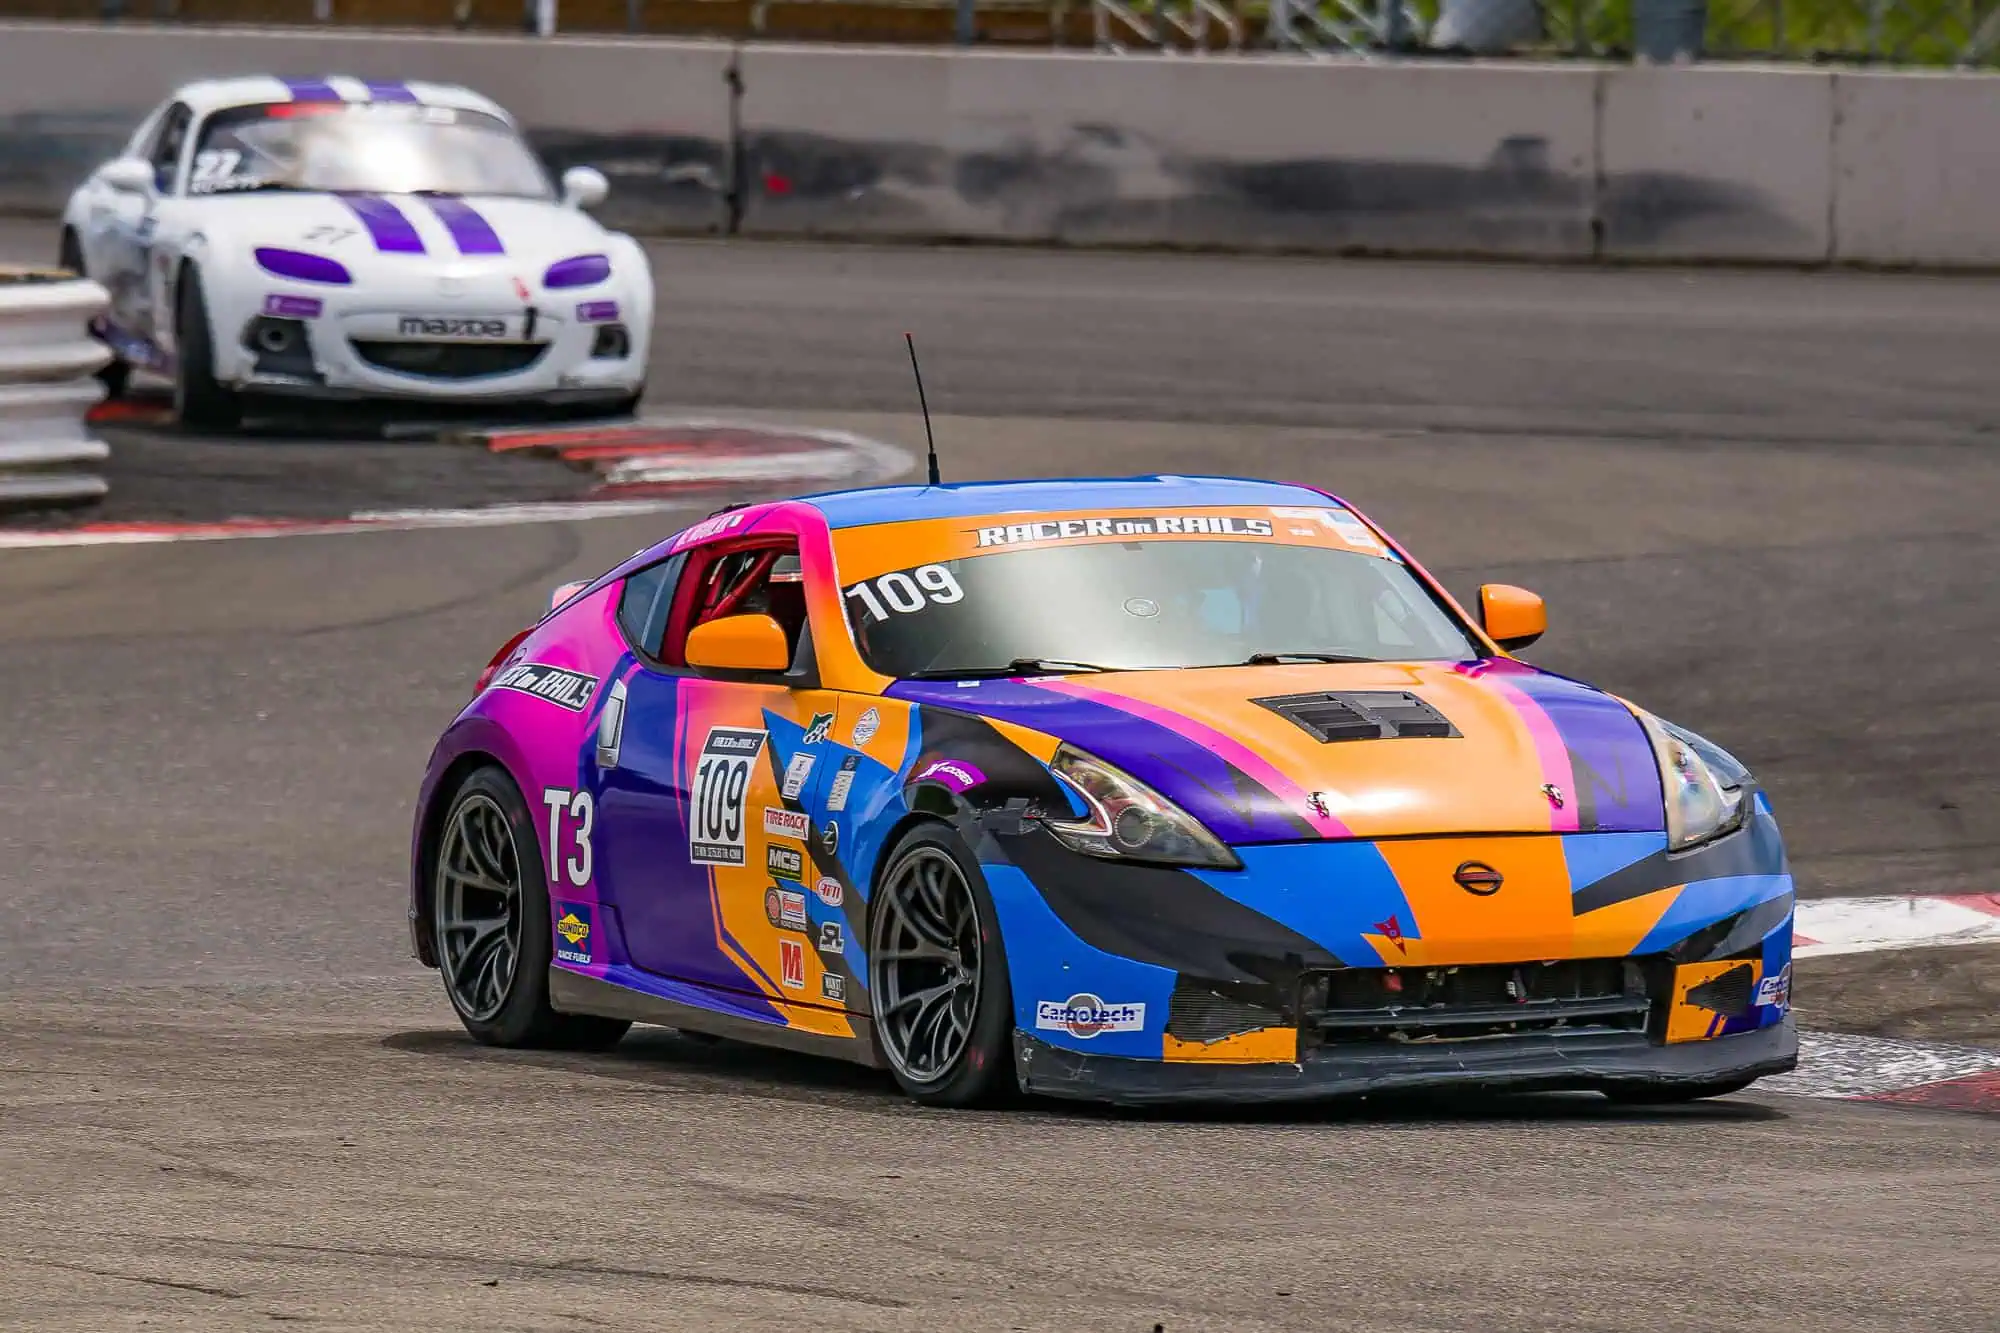
The result was an easy Touring 3 pole, a Saturday T3 win, and then another T3 win on Sunday to complete the weekend sweep.

Saturday was not without drama. At the start, there was unnecessary contact with the STU pole sitter that could have ended the race before it properly got going. Thankfully, the Apex forged wheel took an absurd hit and somehow held on. The car survived, the tire held, and we were able to finish.

Racer on Rails Nissan 370Z leading a tight pack of race cars through the Portland International Raceway chicane during the SCCA Hoosier Super Tour.
Saturday’s race had contact, traffic, and plenty of chicane chaos, but the 370Z stayed together and brought home the Touring 3 win. (C) 2025 Doug Berger | DBPics

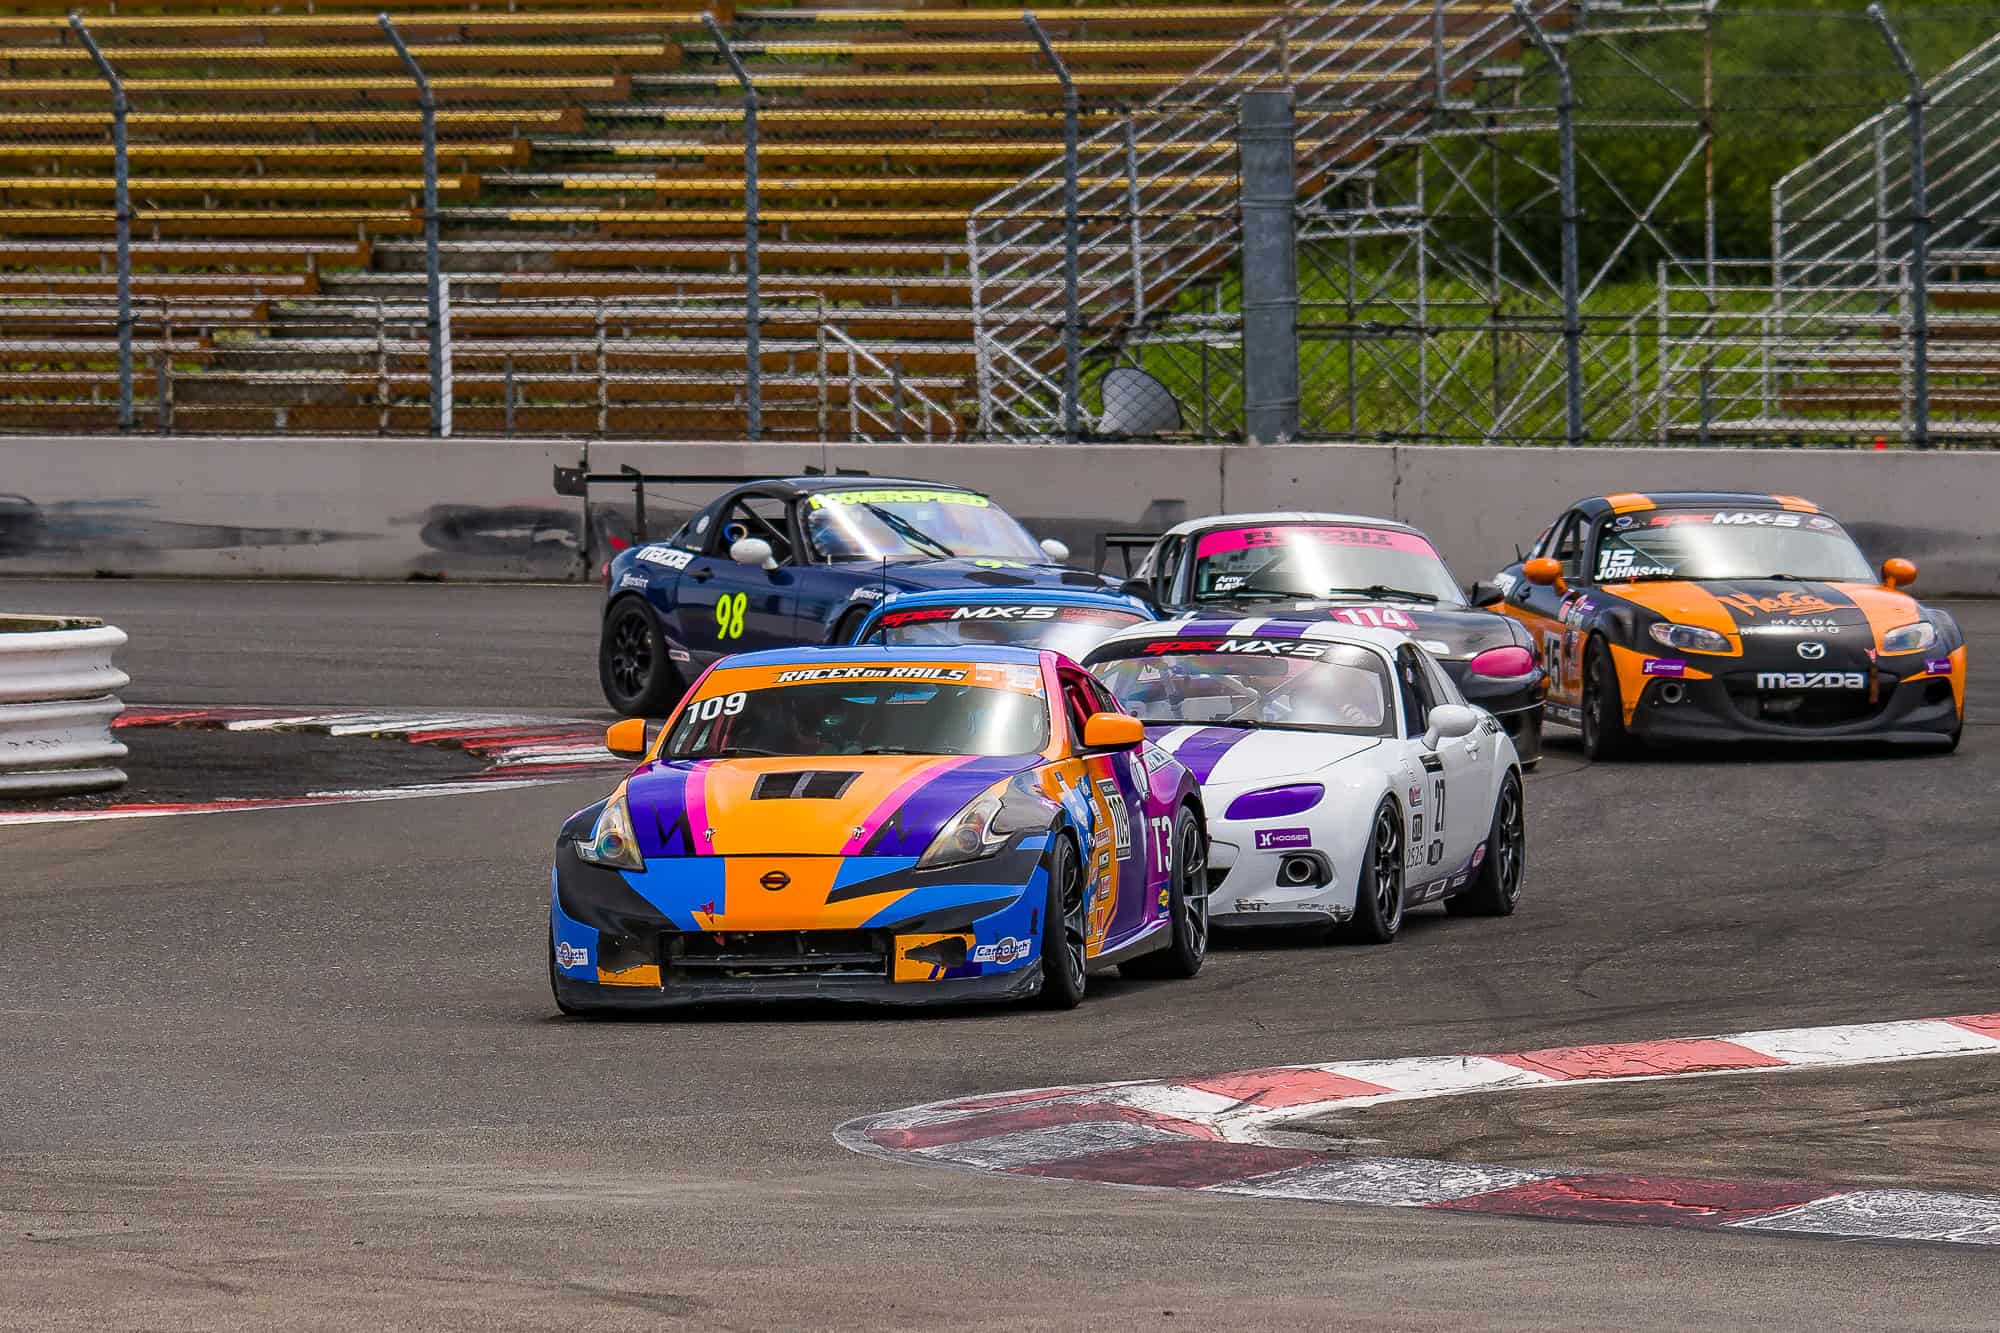
On Sunday, we replaced the damaged wheel and tire, put our heads down, and went for a maximum race-pace push.

That was the most encouraging part of the weekend. Not just winning. Not just getting through the races. But seeing that the car had pace in conditions that were not perfect. The overcast morning cloud cover had burned off by the time our Sunday race started, the track was warmer, and the car still had the ability to push toward the kind of pace we have seen from some of the strongest Touring 3 drivers at this event in prior years.

Gama Aguilar-Gamez driving the Racer on Rails Nissan 370Z Touring 3 race car through Portland International Raceway with a Spec MX-5 behind.
The weekend’s biggest win was not just the result. It was finally having a 370Z that could be leaned on lap after lap. (C) 2025 Doug Berger | DBPics

That is the good stuff.

The kind of weekend where the notebook matters as much as the trophy.

The Team Behind the Weekend

Like most race weekends, Portland had its share of curveballs.

Jordan’s personal car broke down on the way to Portland. Beef’s M240iR tried to turn Friday into a cooling system crime scene. Chris’s Spec E46 had to be monitored all weekend after an over-rev and smoke. The Z needed continued tuning and then a wheel/tire change after race contact.

None of that is unusual in racing. That is the job.

What mattered was how the team responded.

Ian’s engineering work before the event gave the Z a new foundation. Jordan kept Chris’s car alive and monitored. Tyler continued guiding drivers through both technical and mental development. The crew absorbed the chaos, kept working the problems, and moved the weekend forward.

That is what we want Racer on Rails to be.

Not just a shop that brings cars to the track. A team that develops cars, develops drivers, solves problems, and helps people leave the weekend with better tools than they arrived with.

Portland gave us a lot.

A Touring 3 weekend sweep for the 370Z. A major mental unlock for Chris. A hard but smart diagnostic call on Beef’s BMW. A valuable SRF3 baseline for Ron. A stronger engineering process for the team. And a reminder that race weekends are rarely clean, but they can still be deeply productive.

We left Portland feeling like the whole program moved forward.

Goals. Smiles. Memories. LFG.

Posted on

From Console to Cockpit: Using Simulators to Develop Real-World Driving Skills

Breaking into high-performance driving can feel overwhelming, even with resources like driving schools and track days. For those new to this world, the challenges of cost, access, and preparation can seem daunting. Thankfully, there’s a way to build your driving skills and confidence right from the comfort of your home: simulators.

Why a simulator? Because you have to practice driving a car in a high performance manner and figure out and learn tracks.

If you’re just getting started, you’re not alone in feeling that even the simulator world can be complex. Gran Turismo 7 and Forza Motorsport have come a long way in recent generations, offering a balance of accessibility and realism. While they may not be as hardcore as iRacing or RFactor2, their physics engines have significantly improved from earlier arcade-style versions. The games now feature photo-realistic graphics, delivering some of the most visually stunning racing environments available in any form of media.

But in this guide, we’re focusing on the simplest and most accessible path: using a simulation-based game like Gran Turismo 7 on PlayStation 5 or Forza Motorsport on Xbox Series S or X, paired with a steering wheel and pedal set from makers such as Fanatec, Moza, Thurstmaster or Logitech. Why consoles? It’s the lowest cost and least complex way to get into sim driving.

In future posts, we’ll cover the more hardcore, usually more expensive, and more complex but more realistic world of PC simulators.


The Wheel and Pedal Set

While a controller technically works (and there are some seriously fast controller based sim drivers in the world), investing in a steering wheel and pedal set transforms the experience. Remember, you’re doing this because you want to drive in the real world, so you need to replicate the real world as best you can. You need to better replicate the sport driving seating and body position. Driving a car via a game controller won’t help you in driving a car with your hands, neck, feet, core, etc…

Here are some recommendations tailored to beginners using Gran Turismo 7 or Forza Motorsport:

  • Moza R3 Racing Wheel and Pedals: A fantastic entry-level option offering responsive feedback and solid build quality. It’s compatible with both PC and consoles, making it a versatile choice for beginners looking for immersive gameplay.
  • Logitech G29/G920: Affordable and compatible with both PlayStation (G29) and Xbox (G920), this set offers solid force feedback and durability.
  • Thrustmaster T248: A step up in features, it supports force feedback and customizable pedal resistance, making it great for beginners aiming for a more immersive experience.
  • Fanatec DD: For those wanting a premium experience, Fanatec offers wheel bases with direct drive technology, providing incredibly realistic feedback. Pair it with the Fanatec pedals and steering wheels for a plug and play experience.

Key features to look for include:

  • Force Feedback: Simulates the forces acting on the car for realistic feel via the steering wheel.
  • Responsive Pedals: Allows precise throttle and brake modulation.
  • Adjustable Settings: Customizable settings to match your preferences and skill level.

A basic setup can cost anywhere from $300 to $1,000, offering a significant return in terms of immersion and skill development.

All of the options above have options where the wheel and pedals can be a fixed to a desk or ultimately not require a full cockpit setup. But at some point, if you’re really dedicated to driving well in real life, you’ll end up needing to get a cockpit solution but there are many to choose from (something we’ll cover in future blog posts).

Below is the simulator setup we put in my son’s room:

  • We had an extra LG LCD TV around the house (wall mounted) – $0
  • Xbox Series X – $500
  • Fanatec CSL DD QR2 bundle w/Xbox and PC compatible wheel – $500
  • Fanatec CSL pedals – $300
  • Next Level Racing Go Kart Plus Cockpit – $500
  • Forza Motorsport – included in Game Pass subscription but base price is $60

Everything was plug and play. No drivers or software to install. Everything just works and you still have the ability to adjust wheel feedback settings within each game.

Note that unless you are for sure going to drive a manual car in real life, stick to getting a 2-pedal set. Since this is my son’s simulator (though I drive it a ton!) we haven’t gotten close to having him drive an H-Pattern shifter. The extra cost of the 3-pedal set was unnecessary.


How to Practice Effectively on a Simulator

To help our drivers develop real-world skills through simulators, we recommend following a structured approach with clear benchmarks:

  1. Master Consistency: Start by choosing any car and track combination. If there is one that you can drive in real life, pick that one but it honestly doesn’t matter much. Maybe don’t start with the Nordschleife at the Nürburgring due to the massive length of a lap. The goal is to complete at least 10 consecutive laps within 0.5 seconds of your fastest time, without spinning or crashing. This builds smoothness and precision.
  2. Progress to Career Mode Races: Once consistent lap times are achieved, begin participating in career mode races against AI drivers. This introduces racecraft, such as overtaking, defending, and maintaining focus in a competitive environment.
  3. Increase AI Difficulty Gradually: After completing 10+ races without incidents of your own making, start increasing the difficulty of the AI opponents. This challenges you to compete against faster and more skilled virtual drivers, simulating a more realistic race environment.
  4. Transition to Multiplayer Racing: When you’re consistently driving within 0.5 seconds of your best lap time and have completed multiple incident-free races against high-difficulty AI, it’s time to take on human competition. Join private or public multiplayer lobbies to test your skills against real-world opponents. There are some seriously fast simulator drivers all over the world so go in eyes wide open! Remember, your goal is to work on your skills for the real world, not to be a simulator racing champion.

Simulators are more than just games—they’re training tools. To get the most out of your time:

  1. Start Slow: Begin with easier tracks and lower powered/lighter cars to focus on fundamentals like braking and cornering.
  2. Learn the Racing Line: Follow track guides and in-game tutorials to understand the ideal line.
  3. Focus on Consistency: Aim for smooth, repeatable laps before pushing for speed.
  4. Experiment with Settings: Adjust car setups and difficulty levels as you improve.
  5. Use Ghosts and Replays: Analyze your laps and compare them to faster drivers to identify areas for improvement.

From Virtual to Reality: Bridging the Gap

While simulators provide invaluable practice, transitioning to real-world driving requires adapting to physical forces and sensory feedback – it’s real! But the habits you develop on a simulator—like the foundational driver inputs, spatial awareness, and car control —make this transition significantly easier.

Many professional drivers, including F1 and endurance racing, credit simulators as a vital part of their training regimen. Even for am’s, the benefits are clear: more confidence, better instincts, and a deeper understanding of vehicle dynamics for when you hit the track in real life.


Your Next Steps

Whether you’re using a simulator to prepare for your first track day or simply want to enjoy the thrill of driving from home, this is a fantastic way to develop your skills. In future posts, we’ll dive deeper into advanced simulator setups, track-specific tips, and how to take your virtual driving to the next level.

Ready to start? Grab your wheel, fire up Gran Turismo 7 or Forza Motorsport, and begin your journey toward becoming a confident and skilled driver—one lap at a time.

Posted on

2024 Private Test and Track Days

In 2023 we tried something out based on what we were hearing from our drivers and partners, how can we get quality track time outside of a race weekend to truly put in some work? Driver work, setup work, and generally car development work!

So we hosted our private run groups and even full on track days, in partnership with ProFormance Racing School at Pacific Raceways and Dundon Motorsports at the Ridge Motorsports Park. Those went over really well, so we’re building on that in 2024 with the following initial schedule.

Note that we will likely add more days for August – December and we’ll update this post as those days get finalized.

Private Run Group w/ProFormance Racing School @ Pacific Raceways

These events are held within the ProFormance HPDE days but it is our own run group, for licensed race car drivers and advanced HPDE drivers only. 30 Minute sessions every hour, for a total of at least 2 hours of track time and potentially more during the 4-5pm hour, all depending on available daylight conditions.

Check out the links to signup on Motorsportreg.com

Private Track Day w/Dundon Motorsports @ The Ridge Motorsports Park

These events are entirely our own private events, with two run groups. A race car run group for all fully licensed and compliant race cars and a Dundon Motorsport Driver Street car group for vetted and experienced street car drivers. The street car group may be made up of street cars or non-licensed race car drivers driving race cars, but these cars are seriously fast. Due to how fast these cars and drivers are, we want to ensure there is not too large of a speed gap in between cars, to keep things safe.

The days are setup for 45 minute sessions for each group, alternating throughout the day and then the groups are usually combined at the last hour of day, mostly because most people have run out of human gas, gas gas, tires and/or brakes!

Sign up and don’t hesitate to reach out if you have any questions!

Posted on

Race Report 1: Buttonwillow SCCA US Majors January 14 – 16 2022

Fully loaded team for SCCA weekend at Buttonwillow

2022 is going to be a busy and exciting race schedule for the Racer on Rails crew and the first stop was this past weekend at Buttonwillow Raceway Park.

Note, originally we were supposed to be at Sebring International Raceways for the SCCA Hoosier Super Tour but the beautiful white Christmas we had in the PNW overstayed its welcome and by the time we need to have the trucks on the road to the SE, all the passes out of WA were closed due to blizzard conditions and the alternate route going down the west coast and across the SW was riddled with freezing or snow conditions in New Mexico, Texas and even parts of Alabama.

So with about 10 days’ notice, we made the change to instead to go sunny southern California where last year, we attended this same race but it was held at Autoclub Motor Speedway in Fontana, CA.

The Team

For the first race, we had three Spec E46’s running in Touring 3 (T3) trim and one Porsche Cayman GT4 Clubsport running in GT2 class.

Racer on Rails drivers - 3 Spec E46's and one Porsche Cayman GT4 Clubsport
#44 Dave Orem, #81 Simon Asselin, #109 Gama Aguilar and #4 Ann Doherty

The normal crew of Jordan, Bryce and Gama were on hand but this was also the first official race weekend with our new Motorsports Director, Memo Calderon and our service advisor, Reid Morris.

The Fog

Not going to mince words here, it was a tough weekend and mostly due to dense fog that rolled in each night and resulted in each morning’s scheduled run groups to be postponed due to low visibility conditions.  One of the locals at one of the on-site race shops with a retail space mentioned that it had been close to 27 years since they had seen such thick fog and turns out that the volcano eruption in Tonga might have contributed to the fog conditions.

In the end, each day we didn’t get started on-track until 11am – 12noon. On the Friday test day, the run groups ran per the schedule as the organizer simply picked up when we started and had the 3 run groups doing 20 minute sessions each hour, until 5pm.

Racer on Rails cars ready to go on-track but under a fog hold on the Friday test day

Thank You Safety Equipment!

There is never a shortage of reasons to not skimp on safety equipment choices, design and preventative maintenance as we never plan on having an issue where safety equipment is needed but we’re always glad when it’s there and it works.

We had two incidents on the test day:

  1. Failed front-right lower ball joint in the control arm (SE46): The #109 SE36 running in T3 trim got a near complete overhaul prior to the 2021 SCCA Runoffs at Indy, which included brand new lower control arms. Unfortunately it got taken out on lap 1 of the race which resulted in a front end impact with at least energy going through the suspension components but not a direct hit or contact. All in, the control arm and lower ball joint had 1-1.5 hours of run time prior to this weekend. On the very first session when the fog broke, lap 2, braking for Sunset corner (the last corner before s/f), the inner lower ball joint failed and the car went plowing through the corner and came to a stand still on the exit of the corner. On top of needing to make repairs to get the car back up and running, it also caused a black flag which ended running for everyone else.
  2. Rollover on the exit of the kink before Phil Hill: With the fog and being in mid-January, the track was not just green each morning from fog moisture but also stone cold. It was 38F on Friday morning and barely broke 50F once the fog cleared for the afternoon. This meant really tough conditions in terms of finding grip and in the 3rd session of the test day, the #44 took the same line as in previous laps with maybe a tiny bit more steering angle, hit the curb of the kink like normal but this time it upset the car a tad bit too much and the backend came around. The car slid off-track and when it hit the dirt, which with the moisture and temperatures was more like mud, the wheels hooked into the dirt and the car barrel rolled. We’ll have another post in the future to dissect and share how the cage and all the safety equipment faired.

Making Lemonade Out of Lemons

New track, very limited run time and low grip conditions – what do you do? Make the most of it and work on the learning process! Expectations for big results are low, so instead focus on developing and that’s exactly what each driver did, with the help of driver coaches Seth Thomas and Ray Phillips!

Porsche Cayman GT4 Clubsport driver, Ann Doherty, studying the track notes and areas of improvement.
Ann D studying her track notes and mentally preparing for the next time on-track.

Through the coaching from Seth and Ray, each driver made progress across the limited running and culminated in a podium position for each driver! Below are some areas that were focused on throughout the weekend:

  • Squaring off corners better in low grip/wet conditions and to setup exit of the following straights
  • Timing of transitions from brake to gas and vice versa
  • Establishing a connection or translation layer between what driving Buttonwillow in the simulator felt like relative to real life
  • Mentality to have when going into a race with changing conditions (both getting worse and getting better)
  • How to explore grip when conditions are improving
Ray Phillips doing a quick debrief after a session while in post-session tech.

Moving forward to COTA in February

So we came out of Buttonwillow with 3 of the 4 cars running, 4 trophies, 1 race win, 5+ second improvements in dry running lap times from Friday afternoon to Sunday afternoon, a new T3 track record for Buttonwillow CW14 configuration with a 1:55.376 and ready for the next round at Circuit of the Americas February 4 – 6, 2022.

  • Simon made gains across both races and had an epic battle with a T3 Porsche Boxer, having led a good part of Race 2
  • Ann made a massive step from Saturday to Sunday, dropping 8 seconds in one day and snagging two podium positions in GT2
  • Dave had limited running due to the incident but was fully healthy after being checked out by medics and will be back on track for COTA
  • Gama won race 1, broke the track record by multiple seconds and was leading race 2 (and in a battle with an STU car) but the coolant expansion tank failed, resulting in an overheating engine which forced him to retire the race but not before improving on the track record

With one new track for most of our drivers under our belt, we can adjust the preparation in the simulator and the development plans for the test day and each of the on-track race sessions.

Thanks to the team, Ann, Dave, Simon, Ray, Seth and everyone from the Cal Club who made this weekend possible and making the most out of a pretty tough first race of the year.

Stay tuned for more of our adventures in 2022!

Posted on

v1.3 Assetto Corsa Spec E46 Now Available

Today, we’re excited to release another update of the BMW Spec E46 mod car for Assetto Corsa.

There is only one update to the car but it’s an important one, we’ve updated the suspension geometry to be based exactly off a real-world SE46 race car. Below you’ll see that we took measurements of every component of the chassis and suspension geometry down to the millimeter (while we were building a new SE46 race car), so the virtual car could handle as closely to the real-car, as possible.

The end result? Generally the car feels easier to drive and we found an additional .5-1 second almost immediately (after playing with the setup).

All existing owners will get this update and all future customers will get v1.3 moving forward. Let us know what you think!

Get the updated BMW Spec E46 for Assetto Corsa, here!

Check out a lap around Pacific Raceways with the new suspension geometry below!

YouTube player
Posted on

Building a Sim: I Want to Drive Better in Real Life!

With the explosive growth of simulator driving for not just training but actual competition, big time dollars and rewards attached, we get more and more questions about how to get started building a simulator setup and specifically, what to get.

Still wondering if simulator driving is really that worth it?  Check out this podcast from Speed Secrets and this video about William Byron – now a driver for Hendricks Motorsports, who didn’t grow up driving karts or cars but rather, simulators.

This can be a complicated space because there are a lot of options.  In this second post, let’s go down one specific path base on what we think is the most important question.

Why do you want a simulator setup?  I want to use simulators to accelerate my driving or car in the real world.

eSports is exploding in popularity with games like Madden, Fortnite and Halo being at the center global gaming tournaments.  Gamers from around the world train and compete against world-class gamers at in-person and virtual tournaments all over the world and for real money.

This is not a spoof! That is a real picture of thousands of people watching gamers compete on-stage!

There are even several universities who have athletic scholarships for student-gamers.  Racing competitions in eSports is no exception – competing and winning real money for simulator driving is real and it’s here.

This post is focused primarily for those who want currently or are planning to drive in the real-world and want to use simulators to accelerate their development.  Getting to the track in the real-life to get quality seat time, driver coaching, and car development is not cheap.  Simulators are an excellent path to do all of those things more often, at a lower cost and increasingly with direct correlation to what happens in the real world.

Recommendation: Go with a PC-based simulator like iRacing, Assetto Corsa (PC edition), Assetto Corsa Competizione or RFactor 2.  Yes, Gran Turismo and Forza have had tournaments where the winners compete in real life for chances to be race car drivers as a profession but those are the exceptions.

It’s time to get serious with triple monitors and the very best components you can buy.

Things to get:

There is no way to get around it – this will be more expensive because you are trying to replicate real life, of which a lot of what happens in real life is about how the car and track sound and feel of your inputs.

  • A quality PC that can keep up with the display you want. The main thing here is a decent processor and ram but the beefiest graphics card you can get and the bar at this level is a little higher than at the ‘simulator only’ level.  Here are a couple options:
    • A PC desktop with a decent i7 processor, 16GB+ of RAM and a 6GB Nvidia GeForce GTX1070 or equivalent from AMD. Get the absolute best graphics card you can get – it will be worth it.
  • iRacing, Assetto Corsa, Assetto Corsa Competizione, RFactor 2 or Project Cars 2.
    • Yes, there are a ton more simulators out there, but these are the heavy hitters.
  • The best peripherals you can buy because you want motorsports grade hardware:
  • Display that will give you the best field of view (FOV) you can afford. Here are my preferences, in order:
    • 24”+ triple screens – I personally have an older version of this model but it doesn’t have pre-drilled holes for monitor stands, which sucks.
    • 27”+ curved screen
    • Virtual reality headset (e.g. Oculus Rift or HTC Vive Pro)
    • 40”+ single monitor/TV: this is not really an option. If you want to really focus on improving your real-world driving, you need an immersive experience.
  • Sim rig with a seat
    • A sim rig/cockpit is no longer optional. You need the seating position, field of view and access to the driver controls to be as close to real-life as possible and you can only really do that with a proper and sturdy sim rig.  Here are a few options:
  • Motion platform
    • Yes, it’s now close to a requirement. Driving in race cars on tracks is a rough experience where you’re getting tossed around as you go over bumps and curbs.  The feeling of the car pitching forward when you hammer the brakes, the car getting upset as you take too much curb or the backend coming loose when you carry too much speed into a corner or get on throttle too quickly – you need to feel that.  All of those things in real life tell you what’s going on and they remind you of the mortal consequences of having more bravery than talent.
    • Want everything integrated and ready to rock?  There several companies who sell fully built and ready to rock motion simulators.  Here are a few:

[URISP id=1774]

Pros:

  • There are few other things that will accelerate your driver development than quality motion simulator seat time.
  • The quality of your experience is completely dependent on the components you put into your PC and peripherals. If you want better graphics, get a better graphics card.  Want better FOV, change your display setup.  Want an even more immersive motion experience with real-time data streaming and coaching?  You can do that too!
  • The force feedback and vibration capabilities of the steering hubs and transducers on the market are amazing. You can buy components and configure then so that you feel everything on your feet, butt, abs, legs and hands as you do in real life.     You will have a generally authentic steering input and feedback experience.
  • There is a growing number of retail locations where you can rent seat time on very high-end simulators and get coaching from top-level coaches.

Cons:

  • No longer “welcome”, you are right in the middle of the slippery slope! It is now the cost of a small car to get a decent motion simulator up and running.  It starts in the $5-10k range and goes into the $50-75k range.  There are simulators well above those ranges but those are reserved for commercial applications.
  • Driving consistently well in a simulator is hard and even more difficult with motion. Most people are lucky to end their first 30 minutes in a simulator simply not crashing or losing control.  Stick with it!
  • Pretty much everything is more complicated to setup. There is almost no plug and play experience for any component.  You need to connect them, install drivers and configure/calibrate.
  • The physics and tire model are better than the console world but vary across simulator platforms.
  • There is even more you can buy, which can be good – for example, buttkickers are sound based vibration devices that give even more feedback to the seat, pedals and generally corners of the car.

Example setups: I’ve only built one motion rig and would be considered “entry level” for a quality motion experience.

  • Example 1: Entry level, motion with a rig: Everything here is exactly what I have on my current motion sim but my graphics card cost a bit more a year ago than they do today.
    • Total Cost: $8,741.39 (doesn’t include taxes or shipping)
      • Custom built desktop gaming PC w/Nvidia GTX1080Ti: $1,200
      • iRacing subscription: $80/year
      • SimXperience Accuforce Hub and steering wheel w/button box: $1,299.00
      • Fanatec SQ Shifter: $199.50
      • Derek Spears Design (DSD) pedals: $895.00
      • OMP Racing seat: $799.00
      • Logitech 5.1 Speaker system: $49.95
      • Next Level Racing Ultimate Cockpit: $800.00
      • Next Level Racing V2 Motion Platform: $2,999.00
      • 3x AOC 24” gaming monitors: $139.98 x 3 = $419.94

If I knew then what I know now, what would I do differently?

The Next Level Racing cockpit is pretty good, and I don’t entirely regret my purchase decision, especially because their motion platform integrates seamlessly BUT if I were building another rig (which I will in the next 6 months or so), I would try the DOF motion cockpit because I don’t love the following about the Next Level Racing cockpit:

  1. The flex in the chassis, especially under heavy braking. First, it flexes and since it wasn’t designed to flex in the first place, the amount of flex is variable.  This isn’t great when you are trying to hit your marks lap after lap or making minor adjustments to brake application to shave off tenths of seconds.
  2. Lack of adjust ability. Having the seating position, steering wheel, shifter and pedals in the perfect position for your body is critical to driving fast and driving consistent.  Any unnecessary mental energy used to figure out where things are or having to adjust to not having the controls in natural/intuitive positions will make you go slower.  The NLR rig is essentially fixed in place after you set things up and for me personally, we had to add a wood block to the pedal box so that my heels could stay planted and reach properly.  The manual shifter position is okay, but I really wish I could move it another inch or two closer to me.  Lastly, with the motion set, the slider doesn’t work.

You listed the Fanatec pedals but you have some other fancy looking pedals.  What gives?

Yes, when the Thrustmaster wheel hub failed after about a year of use, I upgraded to the Fanatec hub but I wanted as close to the real-world race car pedal feel as possible.  On this rig I currently have the Derek Spears Designs pedals which are amazing and use real Wilwood racing pedal box components.  You don’t need these if you are only simulator racing.  I also have two other rigs with the Fanatec V2.5 Clubsport pedals, both the floor mounted and the hanging configurations.  They are solid and when you add the bump stops for the brake pedal, they are close to the DSD pedals but still substantially lower cost.


Posted on

Building a Sim: I Just Want to Have Fun!

With the explosive growth of simulator driving for not just training but actual competition, big time dollars and rewards attached, we get more and more questions about how to get started building a simulator setup and specifically, what to get.

Still wondering if simulator driving is really that worth it?  Check out this podcast from Speed Secrets and this video about William Byron – now a driver for Hendricks Motorsports, who didn’t grow up driving karts or cars but rather, simulators.

This can be a complicated space because there are a lot of options.  In this first post, let’s go down one specific path base on what we think is the most important question.

Why do you want a simulator setup?  I just want to have fun!

I want to have fun: Many people simply want to drive some awesome cars and a variety of tracks, without taking things too seriously.  You don’t care or want to bother with dealing with things like tire pressures, spring rates, shock settings, etc.  You want to jump into a simulator, start driving, sliding and maybe even trade some paint with others or barriers, on your own.  Best of all, it’s the cheapest way to get into simulator driving.

My brother and I getting some laps in on Gran Turismo.

Pros:

  • Console-based simulators are generally of super high-quality graphics in the cars and the tracks.
  • The tracks are essentially what they are like in real-life, it’s a great way to learn a track.
  • Tons of cars. Everything from high-performance street cars to Formula 1 cars.
  • The force feedback capabilities of the Fanatec and Thurstmaster lines are great and good, respectively. You will have a generally authentic steering input and feedback experience.
  • A great tool to focus on your getting your eyes to look far ahead and get ahead of what the car is doing.
  • Getting a console is much less expensive than building a gaming PC and the there are some lower cost peripheral options from Fanatec.  See our shopping list below, where you can get started for under $1k USD!

Cons:

  • Relative to iRacing, the quality of online racing against other real people is not great. People complain about getting crashed into at the rookie and lower levels of iRacing but online racing, outside of some of the bigger tournaments on Forza and Gran Turismo can be downright horrible.
  • The physics and tire model are simply not as good as iRacing, RFactor and Assetto Corsa.
  • Limited triple screen options. It is doable to get a triple screen setup but it’s much more complicated and expensive.  A better option would be a large curved screen or virtual reality headset.
  • Aside from the Fanatec Clubsport V2 and newer pedals, the pedal options are not great. Specifically, is the feel from the brake pedal.  Braking is what separates the good from the great and having a realistic and consistent braking feel is critical.  Most of these console game quality pedals have limited resistance and you essentially train your braking based on the position of pedal, not the pressure and feedback from the pedal.
    • There are options to add a rubber bump stop to the brake pedal (of which I did to my Thrustmaster setup) which makes things better but still not as great as some of the high-end PC only brake kits.
  • Quality – this may have improved but just simply the quality of the components is not great. I was using the setup pictured below to really work on my driving, so I was put on hundreds of hours on the components per year.  If I recall correctly, the Thrustmaster steering wheel base lasted just over a year before it just stopped responding one day.  That was when I decided to upgrade to Fanatec and shift to a PC simulator and iRacing.

Example setups:

  • Thrustmaster, Forza and Xbox One: This was my first “simulator” setup going back to 2012 or so. I felt a little intimidated with getting into PC-based stuff, so between a Christmas present from my in-laws, my wife and my own purchases, I had a decent Forza based setup.  I spent hours working on fixed setup time attach competitions, primarily in a Mazda Miata and trying to build the cars I had in the real-world, in the game (Mitsubishi Lancer Evoluiont 9).  All in, this setup cost about $1,200.
    • Total Cost (assumes you already have a TV): $1,428.76 + S/H + Tax w/PlaySeat.  Under $1k w/out Playseat.
      • Xbox One S Forza Motorsport Bundle: $389.99
      • Thrustmaster  VG TMX PRO Wheel, Base and pedals: $321.81
      • Thrustmaster TH8 shifter: $217.96
      • Playseat sim rig: $499

Yes, that is the pedal set taped down to the floor base.

Memories of me working my tail off to move up in the leaderboards.

  • For about a 3-month period I had a Gran Turismo and PS3 setup with a Logitech setup but it wasn’t any better than what I had with Forza so I sold everything off. Total cost was right around the same as the Forza.

Do you have an awesome console based sim set up?  Post some pics in the comments!

Check out future posts on two other paths:

  • I want to get serious about simulator driving: This means you don’t care at all or much about driving in the real-world. You are all-in on simulator driving.
  • I want to use simulators to help me be a better driver in the real world: This means you currently or plan to be driving on track in the real-world and you want a simulator to help with driver and car development
Posted on

Track Walk: The Ridge Motorsports Park

Welcome to The Ridge!  The Ridge is the newest track in the Pacific Northwest that is generally available to the public (Vancouver Island Motorsports Park opened recently but is a private track).

Similar to the Portland International Raceways (with a Chicane) track walk, we’ll use the Track Attack #209 PRO3 race car, a relatively low powered “momentum” car, to illustrate how to get around the track.  The session data we are  using for this is available here on Track Attack – feel free to request it.

We’ve also broken the track down into 6 segments, each segment is defined right before the major major braking/slowing down zones.

Braking a track down into sections, makes it easier for people ‘consume’ it and prioritize where to get focus.

Before you read on, watch this complete lap from a dry race in September of 2017.  Read the article and the re-watch the video.

YouTube player

Segment 1: The Uphill

This segment starts at s/f and goes all the way up to the first major braking zone (not including braking for T2) entering the Carousel.  The first thing here is that this segment is a 76ft climb in elevation.  The equivalent of an 8 story building.  Yeah.  So every single loss of mph as you make your way up the hill, will be penalized with a multiplier as you go uphill – keeping the momentum going is a top priority.

Momentum is important – check!  Turn 1 – get ready for a trouser check.  Turn 1, in some cars, can be taken flat, without lifting.  This is similar to T1 at Spokane but the distance between T1 apex and turn-in for T2 is not as long, so in cars that are faster than a Spec Miata, experiment with caution.  Personally, the most I’ve ever been able to get away with is a ~4/10 braking effort – just a tad more than a brush of the brakes, go back to tad of maintenance throttle and then back on the brakes, about the same amount for the downshift to 4th gear and then going back up the hill.

As you get the car past the apex of T2, it’s really important to get close to the curb of T3 but don’t take too big of a bite off of it, as it will send your car back to track-left, which is not the ideal line for the remainder of the complex.  Once you get to full-throttle, you absolutely cannot lift.  After T3, stay track-right, to setup a wide arch into T5 and then release the car to driver’s-right.  This whole time between T3 through T5, when you’re pinned to full throttle, you will feel the back end wanting to step out.  That’s ok – simple counter steering corrections (small ones), while staying flat, will take care of them.

After this, it’s smooth sailing to The Carousel – find a straight line to follow, that will set you up on track-right, for T6 (The Carousel), which is a long, flat left-hand sweeper.

Segment 2: The Carousel

This segment is just one corner.  Why?  It’s long and hard to get right.  This corner can be taken many ways but here is one that has proven well in racing and qualifying conditions.  Set yourself up track right but not necessarily right on the edge of the track.  Brake a little later than feels comfortable with a solid 6-7/10 effort and after the initial bite, start trailing off and turning into the corner, like if you were trying to double-apex the corner.

The backend may start to come out as you turn-in so get ready to catch the backend with some maintenance throttle.  Try to keep the car tucked in tight to the inside edge of the corner and if it washes out a little mid-corner, that’s ok and that just means you can back on throttle even more aggressively for corner-exit, because you don’t need as much steering input.

Don’t mind what looks like me driving off the course, that’s just a natural occurrence of margin of error of GPS signals and the stitching together of satellite images for maps.

About 35-40% through the corner, you want to be on-throttle and free here on out, you don’t lift.  Start your ascension to full-throttle and as you feel the backend come out, pause the throttle application and give it a steering correction but DO NOT LIFT!  For me, there is a single, tall tree out in the horizon of this corner and the instant I see that tree, I go full-throttle, no matter where I am.

From here, let the car release all the way to track-right, the very edge if needed.  A lot of people don’t get out here because they want to setup far left for the next segment and that’s a trade-off you can decide to make.

Segment 3: The Thumb

This is one of the trickiest parts of the track.  It combines a big compression and low-speed traction event at 8a and 8b but also a super hard, decreasing radius turn at T11 (aka The Thumb).

As you come out of The Carousel, it’s ok to stay driver’s left and then draw a straight line as you go downhill at 8a.  Stay on throttle until right before you feel the ground fall away, lift and synchronize the compression event with your braking.  When you do this right, you don’t need to brake as hard because the compression event gives more bite to front-end.  Downshift (if you have to), wait for the car to rotate a tick and then get back to maintenance throttle.  You want to get on full throttle here as quickly as you can but the sliding plus the acceleration means that it will be really easy to get on-power over-steer, so be aggressive but careful with your throttle application.  After you get to full throttle, it’s a full throttle ride all the way up the hill, which is another 36 foot climb (almost a 4 story building).  Every mph you unnecessarily drop or every split second of having to lift from throttle, will make you pay dearly at the top of the hill.

Where you brake for the thumb will be determined by the car and how fast you’re going.  In a PRO3 car, the engine is spinning at 6,500RPM and ~103mph and we wait to come off throttle just before the curbing on the left and are well into the brakes at those curbs.

You don’t need to track all the way to driver’s right to setup for the thumb, about mid-track is fine in most cars.  Next, is one of the hardest corners to get right – find the late apex and make it your job to hit that curbing with your LF tires.  Getting on those tires, in 3rd gear (in many cars, 2nd gear in Spec Miatas), means you can get on the throttle hard and have plenty of room on the exit of the corner.  Be ready for the car to wash out and go on the exit curbing and maybe even drop a rear tire on the exit of the corner but that’s ok – DO NOT LIFT!

Segment 4 & 5: The Ridge Straight

I’ve broken this segment into two segments because it contains two corners, which are taken very differently and I wanted to leave the last segment being the last corners before the front straight away.

First is the very deceiving Turn 12 right-hander.  It’s deceiving because you can actually car a good amount of speed here and the corner opens up quite a bit on the exit, which means there is a plenty of room for corrections if you maybe got on-throttle too early.

The trick here is to get to the apex and be on full-throttle at the apex.  There is a bump or bulge right at the apex, which will feel like it kicks your car away as you hit but get to full-throttle, stay in it and ride it out.  You’ll almost for sure have the car sliding a little just past exit – a simple steering correction will get it back under you and you can keep going.  Then start making your way over to track-right, to setup for the Ridge complex.

As you approach the corner, you’ll see that the ground starts falling away in the middle of the braking zone – YIKES!!!  This means you have to have your heavy braking done before the ground starts falling away.  Looking at the data, the drop-off is a 7 foot decline in elevation over a 150 foot distance.  150 feet when you’re travelling at 75mph, goes by pretty fast, so this is a split second decision.

As you approach turn-in for the corner, stay on the brakes ever so slightly, so that when you turn in full, the noise is loaded up and will help rotate the car.  It’s ok to bite off a little bit of the curb but don’t get over zealous.

Give it some throttle as soon as you get past the corner, turn for the right hander and stick to track-right as much as you can.  If at all possible, stay off the brakes but you might need to brush the brakes to help the front-end bite.

Segment 6: The Front Straight

The lap is almost over!  You’re barreling down the Ridge Complex, a nearly 80 foot drop and you need to decide what to do for the last corner before the main straight away.  There are couple school’s of thought:

  1. Geometrical fastest line: Swing out wide, carrying more speed because you have a wider arc, a single late apex at Turn 15 and then pin the throttle down until start/finish.
  2. Shortest distance line: Stay a little closer to the inside, use the banking in the corner, travel less distance and hit the apex of Turn 15 at the same spot.

This really depends on what kind of car you have and the track conditions on the outside of Turn 15.  In race weekends, that wide line isn’t used much, so there ends up being a lot of marbles out there.   Great for the rain but not for the dry.

At least in a PRO3 car, we have more grip than power, so as is with many of the other corners, the less distance we have to travel, the better so Option 2 is what you’ll see in the data.

Now, I can totally see an argument even for a PRO3 car to setup for a single flying lap to go super wide, throwing away the lap time for that current lap and setting up for a higher top speed going into Turn 1 or even setting up a competitor for a pass at the end of the straight.

You’ll see in the data that I’m on throttle about mid-corner and full-throttle at about 3/4 of the way of the corner.  After that, it’s about finding the straightest line possible through Turn 16 and the least amount of steering input all the way down the front straight away.

Conclusion: The Ridge is awesome.  Go drive it!

The Ridge is really a fun track.  Newer and well take cared of pavement and plenty of run off room in most corners.  You can get in trouble and it makes you pay but most of the time, it’s dirt and rocks on your car to go along with a bruised ego.

The facilities are constantly improving and with a motocross and a kart track that is a mini version of the big track, there’s few places that can compare.  The downside is that it is located about 30 minutes northwest of Olympia, WA and Shelton has limited hotels but coming out in an RV or camping, is an absolute blast.  Best of all, there are no drag races so every evening, you can do a complete track walk.

Check out the The Ridge Motorsports Park website and Motorsportsreg.com for upcoming events you can sign up for, to drive the Ridge!


Posted on

Track Walk: Portland International Raceways

In a couple weekends, we’re headed back to Portland International Raceways and the first time I’ll get to drive the track for more than one session (in real life) this year and since I was on the Speed Secrets Podcast, earlier in the spring.  I got some live coaching from Ross Bentley and have been excited to implement the tips I heard.  Check out the podcast episode here and subscribe – it’s an awesome podcast with a wide variety of guests and every time, I learn a ton.

So let’s take a lap around the track and go through each sector as defined by the sectors on Track Attack.  Below we’ll be using illustrations from real data from a pair of front-running “spec” racing class cars: my PRO3 and Will Schrader’s Spec Miata.  Both are considered low-power momentum cars but there is enough power and weight difference you’ll see different things happening.

If you are a Spec Miata or PRO3 driver in the Pacific Northwest (or have similar cars), you can request to join the respective teams on Track Attack and get access to the session data that we’re using in these examples. (Link to PRO3 data share team and Northwest Spec Miata Tour)

We’ve broken up PIR w/chicane into 4 sectors.  Each sector is a combination of corners and are split halfway through a ‘straight away’.

Elevation change: None

PIR is like the Lime Rock Park of the west coast.  In the chicane configuration, there are 7 right hand turns, compared to 2.5 left hand turns.  But unlike Lime Rock, the elevation change is near zero.  Check out this video where the data overlay shows the elevation change – there is just under 10 feet of total elevation change.

YouTube player

No real elevation change but there are still some tricks on banking that the track holds.

Segment 1: The festival chicane

The first segment starts at the start/finish line, of which the speed that is carried before the first braking zone is determined heavily by the exit out of T12 on the previous lap and if you might have caught a draft down the front straight.

Braking for T1 will depend on the car and whether its a qualifying lap or a race lap.  In a PRO3 car and a qualifying lap, you can hit the brakes hard right after passing the 400 board and what ends up being right before the 300 marker.  Note, this is hard to replicate lap after lap.  After hitting the brakes hard, start coming off of them and you should already be looking for the apex of T1.  It’s a good practice to put the right-side tires on the FIA curbing at the apex of T1 and even dropping a tire inside of the curbing isn’t bad but puts more stress on the suspension components.

Think about this: When are you releasing the brakes as you enter the corner for T1?  Play around with that.

You’ll want to take a line where you can hit T2 with a late apex.  Why?  There’s a decent straight-away from full-throttle at the exit of T2, all the way until T4.  Focus on doing what you can to get to full-throttle as soon as you possibly can coming out of T2.  Usually when I see data of someone really moving through this segment, it is all about the minimum speed they carry through T1 and how quickly they can get to full-throttle out of T2.  Clearly, there is a trade-off here but that’s the trick – finding the right balance and compromise for you and your car.

Also, the steering input for the change in direction to turn for T2 is relatively abrupt and hard.  Remember, slow speed –> fast hands, fast speed –> slow hands.

Comparing the lines of two front-running cars: Blue is a PRO3 car and Yellow is a Spec Miata.  What differences do you see?

Segment 2: No rest – Attack!

Segment 2 includes T4 – T6 and is one of the areas that separates good from great laps.  It can be easy to coast through this segment, but when you’re looking for the maximum lap time, you need to attack!

Same two cars: Yellow (Spec Miata) and Blue (PRO3). There is a 250-400lbs weight difference depending on the Spec Miata. Why do you think each car may be taking different lines?

T4 is somewhat of a false apex – you don’t absolutely have to hit the curbing but the benefits of staying closer to the curbing is that you travel less distance and you have more room to catch the car, if and when the car is upset by the bumps.  When you brake depends on your car but generally speaking, with the chicane, you can go pretty deep into the braking zone and brake pretty lightly relative to braking for T1.

Think about: As in segment 1, when are you coming off the brakes as you enter T4?

As you dive into the T4, the rear of the car may start sliding, which is a good thing!  Use maintenance throttle to settle it down and slowly start going to full throttle or modulating accordingly.  How much throttle you can give it will depend on the speed you carried through mid-corner and how well the rear-left suspension components are absorbing the bumps.  There is a lot of load on that rear-left, all the way through the exit of T5.  Is your suspension bottoming out?

As you approach T5, you’ll have to either breathe off the throttle to get the car to rotate or give it some very slight braking.  Get turned in and hit that curbing for T5.  Then give it as much throttle as it will take and let the car release to the driver’s left as you approach T6.

T6 has different schools of thought.  One school says sacrifice the corner and run the shortest distance possible.  The other says that you should hit the corner with a wide entry and get an amazing run towards T7, where you don’t flare out as much on the exit of T6.  I’ve seen data from both approaches and it’s really a toss-up.  Find what works best for you and your car.

Just remember that the outside of T6 is off-camber and usually has a ton of marbles.  You don’t want to be caught on the outside of T6 almost ever (save for rain) it will be slow and you will get passed.

Going fast through segment 2 should feel like you are on the ragged edge, having to catch the car slightly throughout the entire complex.  This is no time to rest – attack!

Segment 3: The banana straight!

In my opinion, this is the second most important segment of the track.  T7 leads onto the longest “straight” on the lap, so getting onto full throttle, without backing out is the most important thing here.

Where you determine your braking point will heavily depend on your car but the goal should always be to be at or near full throttle right at the apex of T7.

Can you see the ever so slight differences between the PRO3 (blue) and the Spec Miata (yellow)?

Think about: Where are your eyes when you are on the brakes for T7?  Get them on the apex as soon as you possibly can.

Use one fluid motion to get the steering input for the corner and when you are pointed at the apex, commit and get to full throttle as quickly as you can.  In all of my fastest laps, I have a healthy two tires on the T7 curbing and will have a slight slide on the exit, of which a quick steering correction will get it to stop and doesn’t require a lift.  Over slide on the exit or have to lift after apex and you are dead in the water.

Segment 4: Brown trousers

In my opinion, this is the most important complex of the lap.  It is the scariest and thus, even among good drivers, there is more variance in segment times than in any other segment.

The entry into T10 is the most important and it is much less about how late you can brake and more about how well balanced the car can be, as you carry a higher amount of speed through the corners.

Think about this: Will a car that is stood up on its nose because the driver braked super late, turn better than a car that is balanced front to back because the driver braked maybe a little earlier and lighter?

Some drivers can pull off (in a PRO3 car) braking at the 200 marker and keep the car balanced and others brake at the 300 and it works just as fine.  Figure out what works for you and your car.

Make it your job to always, and I mean always put tires on the drivers-left curbing of T10.  Then make as a straight of a line as you can to brake in a straight-line for T12.  This means that you might miss the curbing on T11.  That’s ok!

Brake in a straight line for T12, focus on when you’re going to release braking for T12 and get just like T7, get your eyes to the apex of T12 as quickly as you can.  Turn in with a single, smooth movement and just nibble or have a full tire on the curbing of T12.  This is slightly less important but if you do this, you’ll know for sure that you’ll have enough track on the exit and avoid hitting the tire walls for the drag strip (of which I’ve hit) or along the main wall.

As Ross suggested during the podcast, the goal is to get to full-throttle as quickly as possible.  If you find yourself near the apex of T12 and at 50-75% full-throttle, just give it the beans!  Go all the way and know that it might slide a little on the exit but you usually don’t need to lift to stop the sliding – a quick steering wheel correction will be plenty.

After that, it’s smooth sailing to start/finish.  Release the car and have the lightest hands on the steering wheel as possible.  Any steering input while at full-throttle is friction and friction means going slower.

Other things to consider

People say that Portland doesn’t use up brakes and tires and that’s sort of true but when you’re pushing, everything makes a difference.  Using the curbs is really important but also has led to pad knock-back for several drivers, which isn’t fun.

Track temperature makes a huge difference on available grip and can swing 20-40 degrees from the morning to the late afternoon.  That could make a difference of up to a second on lap times or more.

Catching a draft can also make a huge difference, upwards of .5 seconds on a lap.  So if you can get a tow early on the main or back straight aways, do it!

Track records are made on <100F surface temps, <80F air temperature, fresh tires, qualifying weight, a draft and putting it all together on the first 2-3 laps of a session.

That’s it!  Let us know what you think about the guide and feel free to comment and share any of your tips and tricks for PIR.  Do you do different things?  If so, share it and tell us why.

Posted on

1st Pro Race, 1st time at Imola and the BMW M235i Racing

Time to finally get into driving and racing at Imola.  Catch up on the story until now by checking out the previous posts on:

I’ve been to Imola before.  2 years ago, we were in Italy for a hackathon week with my teammates on Track Attack, who are based out of the Friuli region, in the northeast area of Italy.  My wife, 1-year old son and I spent a week in a tiny medieval town centrally located to Pisa and Firenze (Florence).  One day, we took a day trip to Autodromo de Enzo I Dino Ferrari, also known as Imola.

Visiting Imola in 2015 during a Lamborghini private event and 100F+ temps.

Lamborghini was holding a private test event, but we were still allowed in, because technically, Imola is a city park.  We walked the grounds, from the outside and inside the track.  My favorite Top Gear episode of all time is the Imola episode, where the crew tries to match the lap time of the Stig’s Italian cousin.  I drove Imola for the fist time in the Formula 1 car simulator at the Imola museum.  I drove the track for 30+ hours in a Mercedes AMG GT3 on iRacing, to prepare.  We did a track walk on Wednesday evening before the Thursday free practice.

It still scared the shit out of me.

Thursday, May 24th, 2018: Optional free practice

We signed up for the optional free practice.  2 sessions.  90-minutes each.  4 drivers.  We decided to give each driver 20 minutes at each session.  Seth would go out first and get a sense for the car and lay down some reference data for us to chase.  And he did just that; a 2:06.XXX and not a single clean lap.

When I played football in high school, I was always scared, and I didn’t suck.  Especially in the games.  One of the coaches could sense it in me and other players, so he said once “half the battle is showing up.  Just show up to compete and your training will take over.”

That is why I raised my hand and asked to go second.  It was surreal, overwhelming and humbling.  I’ve read articles from other first time and regular pro drivers, who have said that in these pro series, the time on track for getting up to speed is limited and regularly interrupted by incidents.  To be honest, I shrugged those stories off and thought, “could it really be much worse than a competitive club racing weekend?”  Yes.  That is exactly how it is.

Not a single driver had a clean 20 minutes.  None of us had a single lap where we weren’t being overtaken by at least a few cars.

YouTube player

This was our new reality and pretty much everything we articulated to explain our pace was an excuse.  Dan Rogers, came up to speed the fastest outside of Seth, having a ton more experience (a 2:10.XXX best lap), then me (2:12.XX) and then Rob (2:16.XXX).

We reviewed data to look for places and ways to get up to speed but it was obvious.  We were driving tentatively, over-slowing on pretty much every corner in general and especially when being overtaken, which was almost every corner.

A common site throughout the weekend. Drive, debrief, data and repeat.  Photo credit: Petr Frýba

All my racing has been multi-class racing, with rarely being in the fastest car on track but this is a whole other level.  The closing speeds and acceleration of pretty much every other car was insane, especially the GT3 cars.  The message from Seth was clear, though he tried to be gentle with us – time to drop excuses and drive.  Yes, the other cars are faster, but we have to figure it out and at least mid-corner speed, we could hang with almost all the cars; Seth had already proved it.  I was driving almost dangerously slow.

When it was time for the second session, it was the same, I got three (3) complete laps over a ~25 minute period. But I was determined to drive confidently and hard.  A couple of 2:10.XXX on the last two laps and on the third lap, where I came into the pits due to another Code 60, I had a 2:09.XXX going, backed up by a rolling best lap of 2:09.269.

Dan would get down to a 2:08.XXX and Rob got down to a 2:10.XXX – we were all progressing!  Seth would not drive the second session, to give us more seat time but he would qualify the next morning and start the race.

By the end of the day, we had no real idea how we stacked up against the competition.  We only knew that we were improving at a good pace and that the 131 car had a stacked lineup of drivers, with one of them being the reigning European BMW Cup champion.  He had been driving a specific M235i Racing car for close to two years and he was/is good.

Code 60: Your new best friend or mortal enemy

Instead of full course yellows, Creventic has “Code 60’s”.  Purple flags come out, with a big circled 60 in the center.  When the Code 60 comes out, all cars a required to slow down, in a smooth deceleration to no more than 60 Kmph.  It’s intended to get cars down to a safe speed so whatever caused the incident can be cleaned up and maintain the gaps between the cars.

See it. Remember it. Respect it. You’ll see it a lot.

In the race, if a Purple 60 comes out and you are near the pits, it gives you an opportunity to swap drivers, change tires and/or fuel up while losing the least amount of track position.  The other side of the blade though is that if you are past the pit exit, it will take up to 4 minutes to make it back to the pit entrance and in that timeframe, the issue might be cleaned up.

Cars do not bunch up for the restart, it’s a simple call for green flags when the Code 60 goes away.  There are random radar guns around the track to check for speeding and they also look at your lap time for a complete lap of a code 60.  If it is faster than a 4:55, you are penalized.  We ended up serving a 12 second penalty one time during the race.

Friday, May 25th, 2018: Practice, qualifying and race part 1 (4 hours)

The next morning, we all went out and made improvements.  I got down to a 2:08.643 in my only complete lap and then a code 60, with a 2:07.XXX on the board. Rob got down to a 2:09.XXX and Dan to a 2:06.XXX.

Next Seth went out to qualify and though we had strict orders to stay off the yellow curbing on all corners, so we could make sure the car survived the 12 hours, the restraints were off for Seth and he went hog wild!  He got down to a 2:02.719, putting is in P2 for the race.

YouTube player

The race started off crazy but mostly clean!  Seth was able to get a good start and stay in P2.  He was in the car for just over 1 hour and 40 minutes and then a Code 60 came out and it was my turn.  Being the driver on-deck, there were several false starts, where it was almost time to go but then not.

I got in the car, refueled and then got going.  Generally, I was able to get up to my speed quickly, steadily improving lap times and topping out at consistent 2:07.xxx’s regardless of traffic.  When I was at the fuel station, I was told on the radio to have my windows up, but that requirement was only during re-fueling, at the refueling station (we couldn’t refuel at our pit spot).  I interpreted the message as “have them up at all times”, which meant I wasn’t feeding fresh air to the air-conditioned helmet blower.  Somewhere after the 1 hour and 15-minute mark, the heat really started to get to me; everything was hot.  Like a heat I’ve only experienced once before when my cool suit didn’t work in a PRO3 car and 100F weather.  I figured I’d get the call at any minute to pit but no call and no Code 60.  What would end up being about 90 minutes into the stint, I started shaking and getting cold shivers.  I radioed in that I probably only had 10 or so more laps in me.

To be honest, I had no idea what was radioed back but it was not “ok, pit next lap”.  I kept driving, trying to remain focused, keep a semblance of a pace and not crash.  Finally, the call came in to pit.  I thought it was because they realized that I was in bad shape, but it was because I was minutes away from going over the 2-hour at a time driving limit.

Driver change!  Photo credit: Petr Frýba

I come in to the pits, stumble out of the car, Rob goes in and I start looking for any source of hydration.  About five minutes after being out of the car, I do a heart rate check on my Apple Watch and… 136BPM.  Holy crap.  And I am still on fire and can’t seem to drink enough water or the special Italian “Gatorade”.  A few minutes later, back in the trailer changing, I get the news that Rob is in the beach after an incident with a GT3 car.  With only ~4 minutes left in the first 4 hours, the workers do not pull us out of the beach and we can’t get it back to the pits for inspection and repairs.  The first 4 hours come to an end we are down 3 laps from the lead.

The end of our day 1 with less than 5 minutes to go.

An hour or so later, we were able to look at the car, from afar while it sat in parc ferme (impound).

Our chariot in Parc Ferme – dirty and slightly broken

Luckily, the car is in the corner and the Sorg crew checks it out and determines we have some bent and broken suspension components.  This eliminates the option to have Dan start the race with the car as is, shake off the rocks and get a sense for how the car runs.

We decided to take a 10-lap penalty, so we could make repairs before the race restarts Saturday morning.  That night we had an excellent spaghetti dinner at the Villa we stayed at (was built in 1420 and owned at one point by Napoleon Bonaparte’s grandmother) and finalized the plan.

Dinner at Napoleon Bonaparte’s grandmother’s villa. Built in 1420 and furniture from the 1700’s…

We were P1 for a good chunk of part 1 of the race because of good luck with Code 60’s but our fastest pace was still slower than our main competition (#131).  With the 10-lap penalty, all we could really do is put our heads down, put down clean laps, stay out of trouble and hope the endurance gods would punish the competition.

Saturday, May 26th, 2018: Race part 2 (8 hours)

Dan would start the race, put down solid laps, stay out of trouble and then hand over the car to Seth.  Seth would go in and do the same, getting back as many laps as possible – hoping that Seth could match lap times with their fastest driver and we would be faster than the rest of their drivers.

Over the general race pace, that would end up being the case – we steadily clawed back laps from the 2nd place car but slowly we’d lose ground to the first place #131.

Dan Rogers (@epsdan) riding the curbs to get us some laps back.  Photo credit: Petr Frýba

In the third stint, I went back in for what would end up being about 1 hour and 45-50 minutes, safely clear of the 2-hour driving limit. I was able to get up to speed even faster than Friday and in the second half of the stint, when the heat soak returned, and I realized the Camelback with a mix of water and Italian Gatorade was not connected to my helmet, something clicked.  Something that Seth had been preaching to us for the past 24 hours (and will be reserved for another time).  I trusted his advice and just did it, and the car didn’t go off into the dirt or in a wall – it held.  The times started steadily falling, the 2:06’s started coming effortlessly, almost regardless of where traffic was interfering.  And then, a 2:05.xxx!  And then another 2:05 in the predictive lap timer but spoiled by traffic and another, spoiled by… me (I was getting greedy).

Traffic or not, need to make up time!  Photo credit: Petr Frýba

I was ecstatic but drained and as I’ll write about in another post, I didn’t have the stamina to sustain 2:05’s.  I had already started driving with the windows cracked and on the straight-aways, I’d put my hand out of the window to funnel outside air in and help cool me down.  The time went by much faster this stint and before I knew it, the call was in to pit.  There was a Code 60 for a badly damaged car which would take 10-15 minutes to clear up, so though the Code 60 came out right after I had passed the pit entrance, I was able to circle back around and pit, under the Code 60 and Dan was able to get back in the car and on track before the green flag flew.

Dan had a great second stint, consistently hitting 2:07’s and staying out of trouble.  We had clawed back more laps and with Seth going in for the closing stint, it would be close.  Enough green flag running or advantageous Code 60’s is what we needed.  Seth came out with a full head of steam and immediately started putting down 2:03’s and 2:04’s – getting back 8-12 seconds per lap to P2. With an hour left in the race, the cars started falling like flies.  One car after another, breaking down on track or barely limping back to the pits for a repair but no Code 60.  Finally, with about 15 minutes left in the race, one of the leading GT3 cars, a beautiful matte-red Mercedes AMG GT pulled to the side of the track with a collapsed front wheel.  Even though it pulled off in a decently safe area, the Code 60 came out, leaving only a few minutes to finish the race and with that, our chances of P2 washed away.

One of the overall race contenders, broken down with less than 15 minutes to go in the race.

After 8 hours, we had clawed back a full 10 laps and were only 20 seconds away from P2.  Another few laps of green flag running… but that’s racing!

Seth Thomas (@racerseththomas) bringing it home in P3   Photo credit: Petr Frýba

Podium finish to top off a great weekend

Despite not being able to claw back P2, we still made it on the podium and it was also my first experience actually standing on a podium, let alone the same podium and podium room that mega stars of racing have been in and stood on.  Overall it was a great experience and looking forward to the next race, which we’re targeting the 24 hour race at Circuit of the Americas in November or possibly Barcelona in September.